Use Case 1
This tutorial will walk through a common sequence of operations in Dataflows. The objective is to demonstrate how a frequently used series of operations can be utilized to create the desired effect in a dataset. At the beginning of this tutorial you will see the sample datasets being imported and the sample dataset at the conclusion of the process. This should help you determine when this series of operations is appropriate for your purposes.
The operations discussed in this tutorial include:
- Import and Load Datasets
- Rename Fields Operations
- Sort Rows Operations
- Join Operations
- Remove Fields
- Drop Prefix
- Store
Prerequisites:
Prior to beginning this tutorial, we have already logged in to the Aunsight platform and navigated to our organization. We have ensured that the datasets we will import have been created. We have also created a new Dataflow. If you would like to review any of these steps, please visit one of the following tutorials.
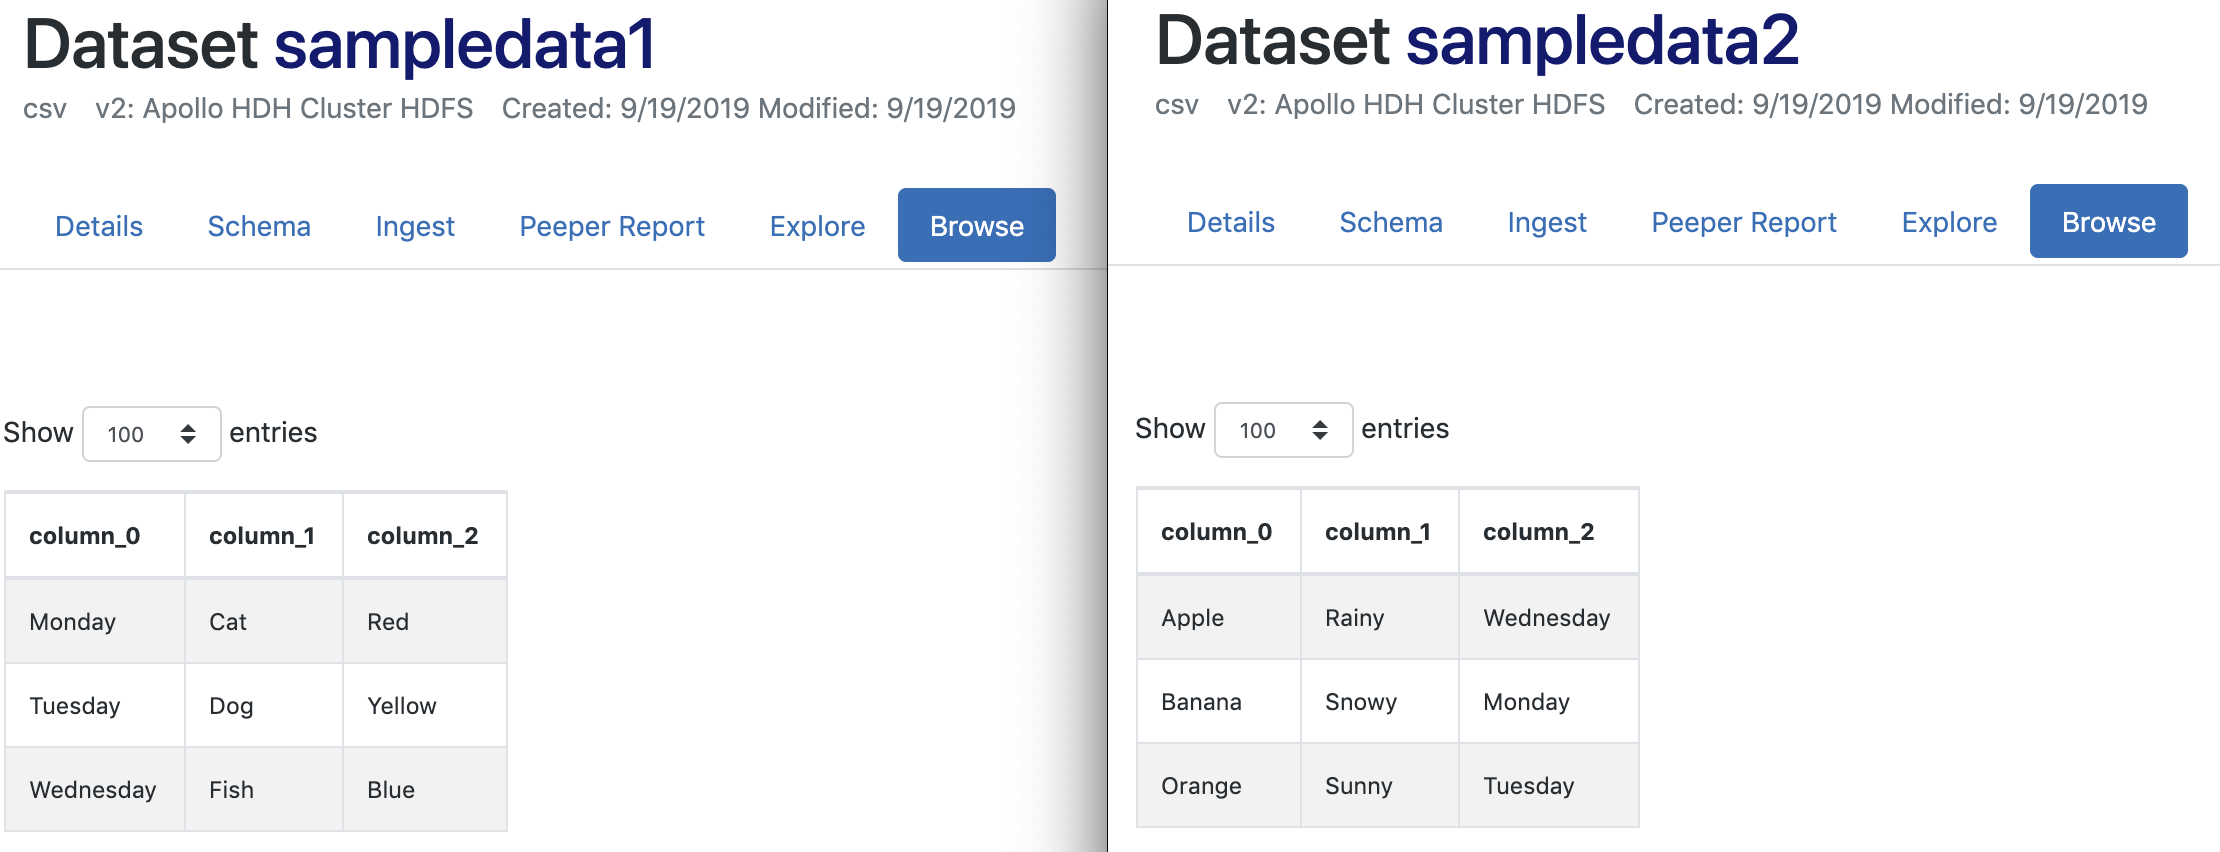
Dataset Before and After
Below is a side-by-side view of each of the two input datasets. The CSV file for each sample dataset was imported into the Datasets tool. Then, the Schema Detector was used to create the schema for each dataset.
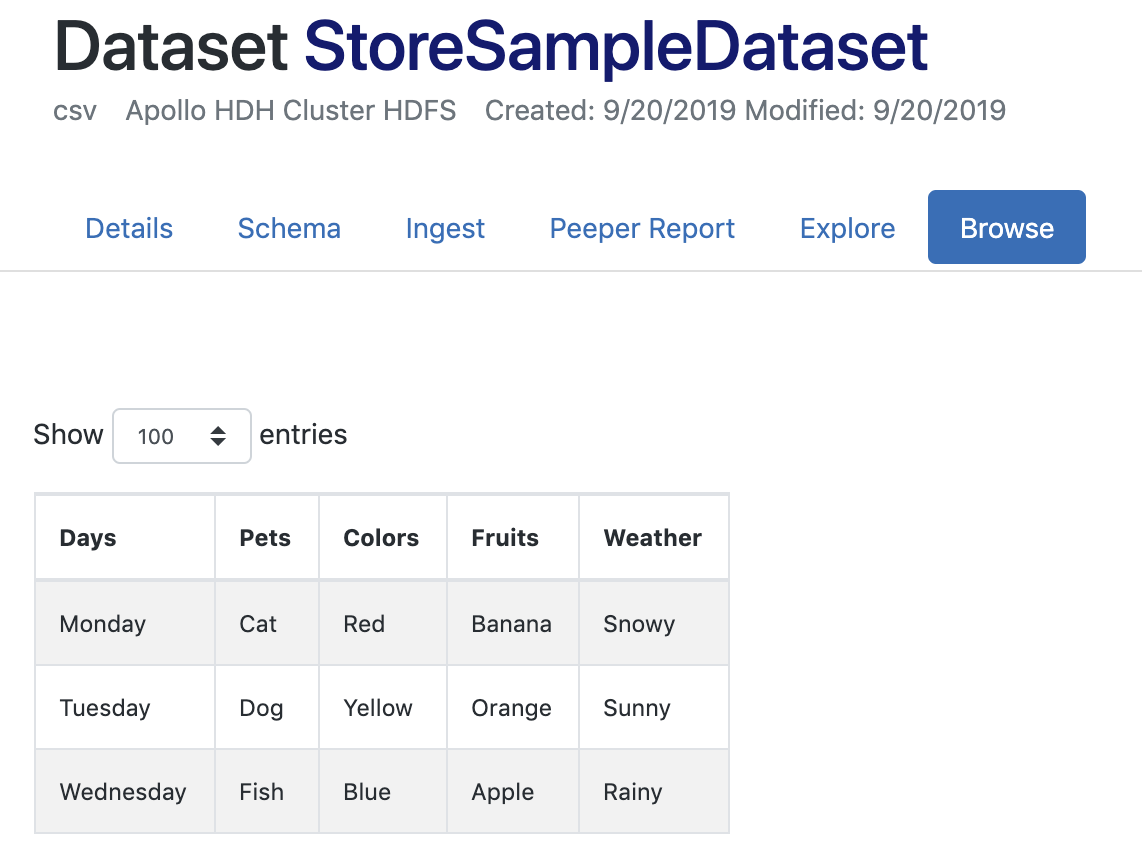
Below is the output dataset that results at the end of this process. This image is provided to illustrate the result from the operations utilized in this tutorial.
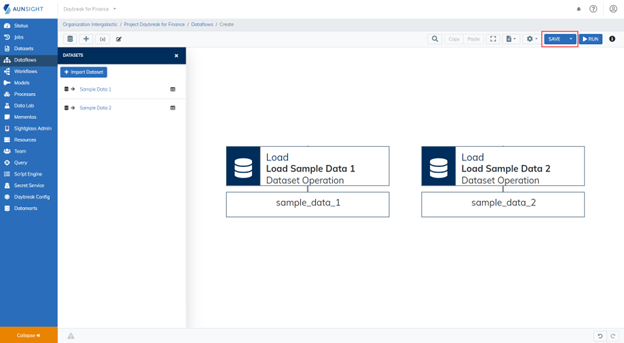
1. Import and Load the Datasets
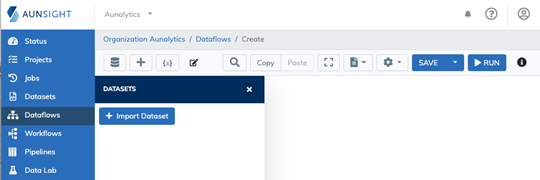
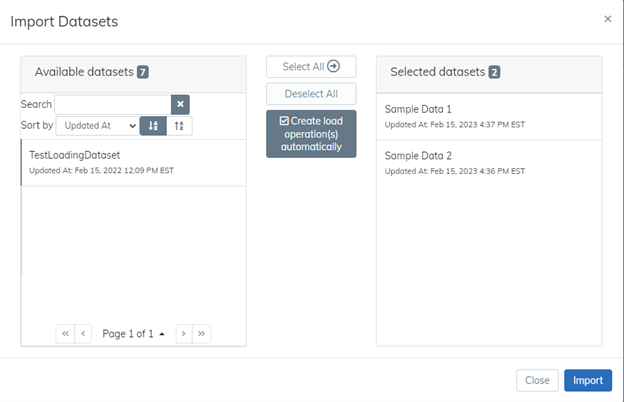
In your new Dataflow, import your datasets by selecting the Import Dataset button. When prompted, select the datasets you would like to import. If the Datasets panel on the left is not open, click the Dataset icon ( ) to open it.
When prompted, select the datasets you would like to import. For this tutorial, we will use the default setting to create load operation(s) automatically. For your use in the future, you may choose to import datasets without loading them into the dataflow automatically.
2. Save the Dataflow
To ensure you do not lose any progress along the way, it is best practice to save your work early and often. Save your dataflow using the Save button. When prompted, type the name for your dataflow. You may provide an optional description or tags.
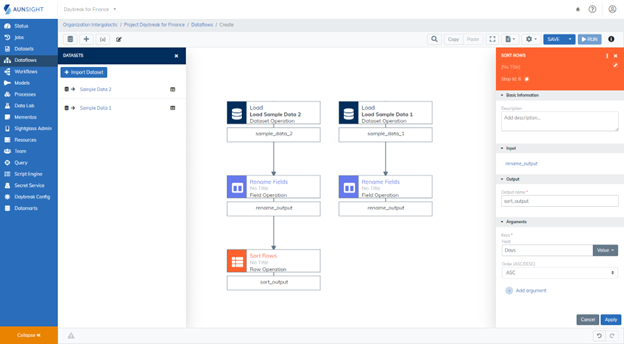
3. The Rename Fields Operations
When we imported our datasets and used the schema detector to write the schema, we left the field names in the default "column_0" format. Before we work on joining our datasets, we are going to clean up the field names. This will make it easier to determine which fields to use as the key when joining the datasets.

4. The Sort Rows Operations
To ensure the key fields join appropriately, we are going to sort our data using the Sort Rows operation. By sorting the key fields in the same manner, we are ensuring the data will be aligned to be easily matched during the join process.
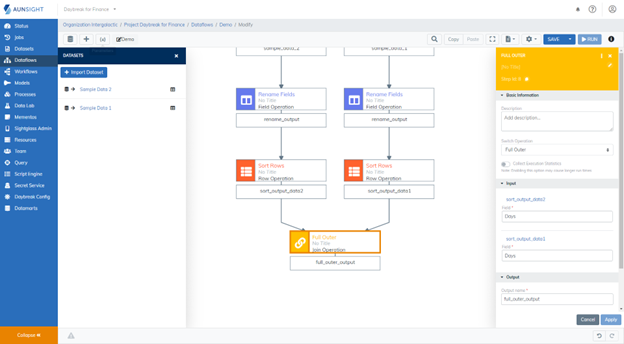
5. The Join Operations
There are three different types of simple joins available in the Aunsight platform: Inner Join, Left Outer Join, Full Outer Join. All three of these options are housed in the Join Operation and are selected via a dropdown menu.
Tip
Inner Join: An inner join is the most time intensive type of join. Each row in the first dataset will be paired with each row in the second dataset.
Left Outer Join: A left outer join will match the key fields in the two datasets by selecting the first element in the first (or left) dataset and comparing it with the first element in the second (or right) dataset. When an element in the second dataset matches one in the first dataset, the rows are combined. If an element in the second dataset does not match its counterpart in the first dataset, the row from the second dataset will be dropped. The empty spaces that result in the combined dataset will be filled with null values. Every row from the first dataset will appear in the result.
Full Outer Join: A full outer join is similar to a left outer join. In a full outer join, every row from each of the input datasets will appear in the resulting dataset. When an element in the key field from the first dataset matches an element in the key field on the second dataset, the rows will be combined. If an element in the key field does not match an element in the other dataset, the data will be preserved in its own row. The empty spaces will be filled with null values.
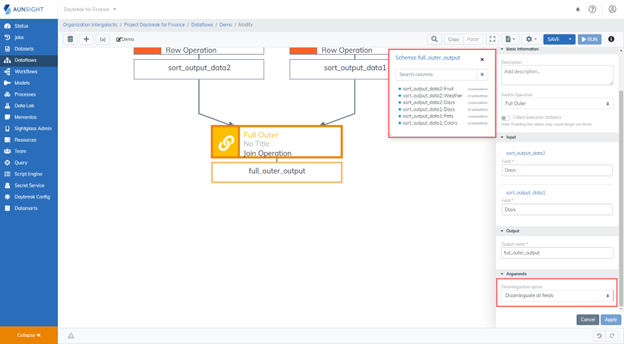
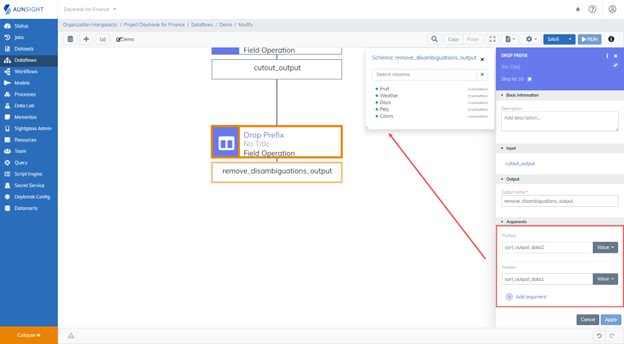
In this join operation, we chose to disambiguate all fields. This means that the input dataset's name was added to each field name as a prefix when they were combined into one dataset. If you store and view the dataset at the conclusion of this join, you will see that each field name indicated which dataset it stems from. When defining the details for the join operation, you can toggle the level of disambiguation that will appear in the resulting dataset. .
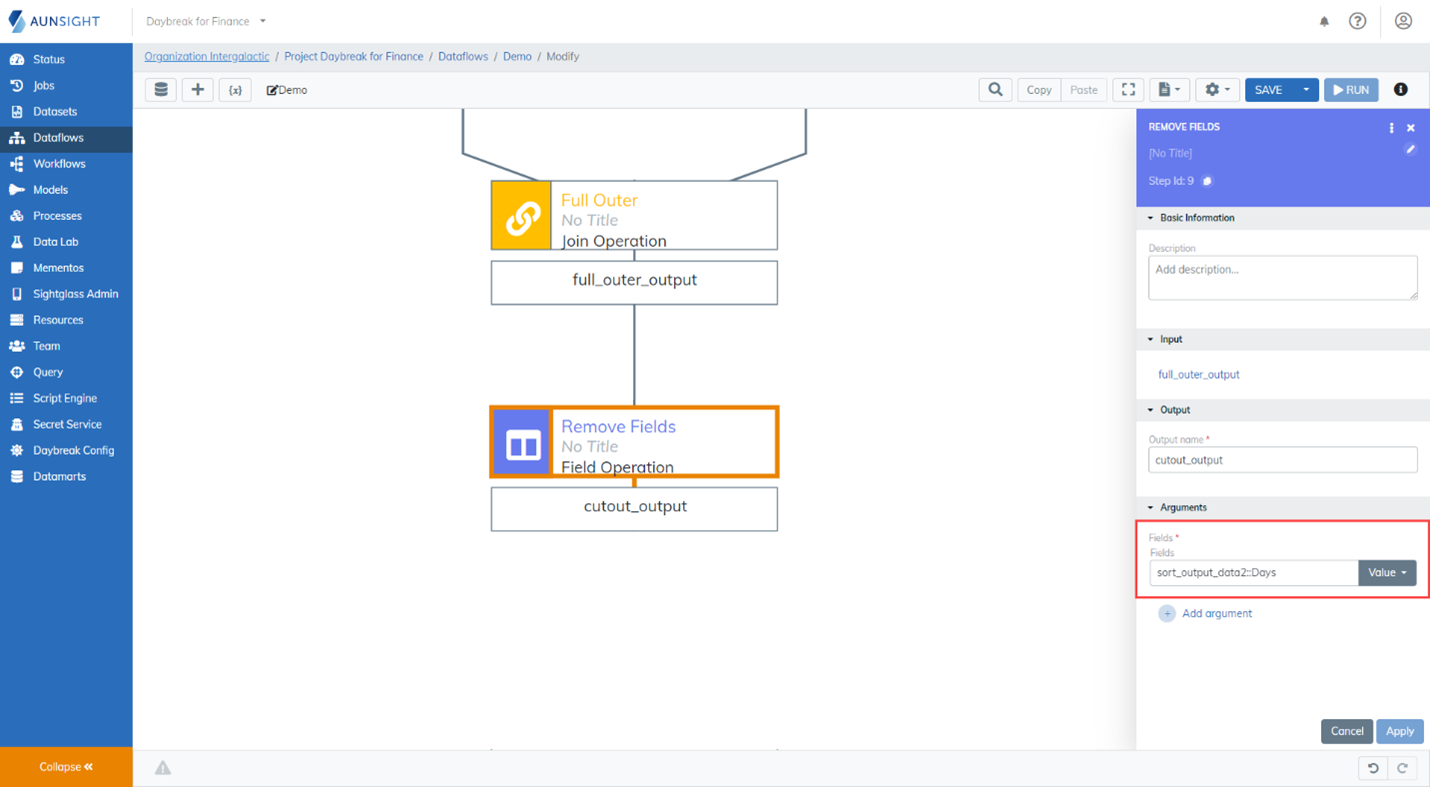
6. The Remove Fields Operation
There are two ways to remove fields from a dataset in the Dataflows tool. The first way, demonstrated below, is to use the Remove Fields operation. While using this operation, select the fields you would like to have removed from the dataset. In this case, we are removing the duplicative Days field (sort_output_data2::Days)
The second way you can remove fields from a dataset is to use the Select Fields operation. When using the Select Fields operation, choose all of the fields you would like to have appear in the resulting dataset. .
Tip
On the canvas, click the output the new operations will be applied to which will open the output schema. With focus in the Arguments field, click on the field from the schema you wish to remove. This field will populate in your argument.
7. The Drop Prefix Operation
Since we chose to disambiguate all fields during the join operation in Step 5 and have now removed the fields we no longer need, we will drop the prefix from the remaining fields in this step. To use this operation, choose the input dataset and type the prefix that should be removed from the fields.
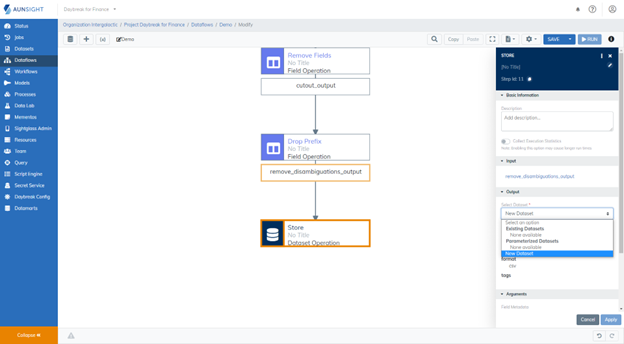
8. Store and Run the Dataflow
Finally, we will use the Store Operation to store the resulting dataset. In this tutorial, we will store the result as a new dataset. If you would like to store the resulting dataset into an existing dataset
Warning
Don't forget to save your work.
Next Steps:
Now that you have created a simple dataflow, you might want to learn how to overwrite a dataset using the store operation. This would allow you to run your dataflow multiple times without continually creating new datasets.