Managing Projects
Aunsight projects provide a means to segregate analytics projects into separately governed contexts under one umbrella organization. Administrators of that parent organization need to know how to create and manage projects to provide space and governance for the various initiatives taking place under their oversight. Aunsight provides a projects workspace that enables administrators to create and manage the projects they need for their organization. This article describes how to use the projects workspace to create, view, delete, and manage projects via their dashboards. After reading this, administrators will want to learn how to create a team leader to complete the handoff to a self-managing project team.
The Projects Workspace
The Aunsight web interface provides a projects workspace to users who have the AU-ORG:view-project permission available to them through a role or group they have in the parent organization.
Note
The Projects workspace is accessible only from within the parent organization context; Aunsight does not allow projects to be "nested" within another project.
To access this workspace, log in to the web interface and select the organization you wish to work in through the context selector. From that context's dashboard, click the "Projects" icon (![]() ) in the palette on the right.
) in the palette on the right.
Note
The projects workspace can only be accessed from an organization context, since projects can only be created at the organization level.
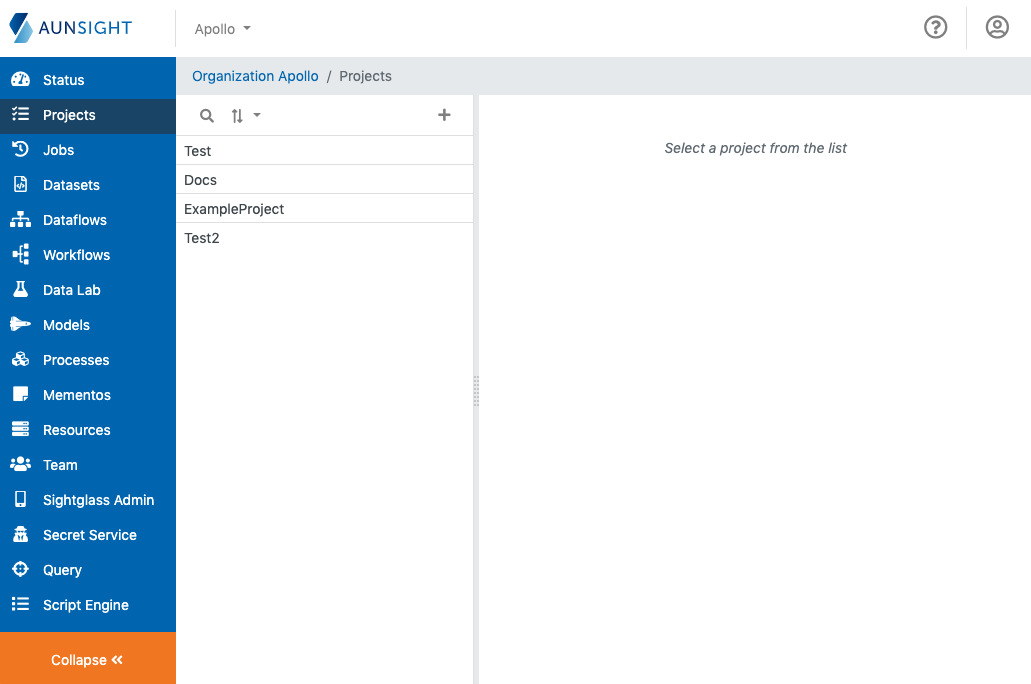
The projects workspace is a standard list-based view of projects within the present organization. You can search (![]() ) and sort (
) and sort (![]() ) the list to find a project by clicking the appropriate icon at the top of the list. You can also create a new project by clicking the plus icon (
) the list to find a project by clicking the appropriate icon at the top of the list. You can also create a new project by clicking the plus icon (![]() ).
).
Create a Project
Clicking the "create project" icon (![]() ) will bring up a dialog to enter a name and description for the project.
) will bring up a dialog to enter a name and description for the project.
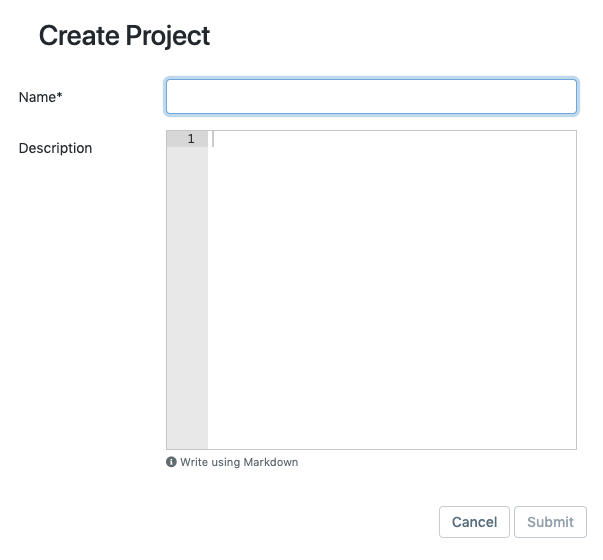
After entering these details, click the "submit" button (![]() ) to create the project.
) to create the project.
Viewing Projects Details
To view details about a project record, search or sort the list and click on the name of a project to bring up its record in the main window.
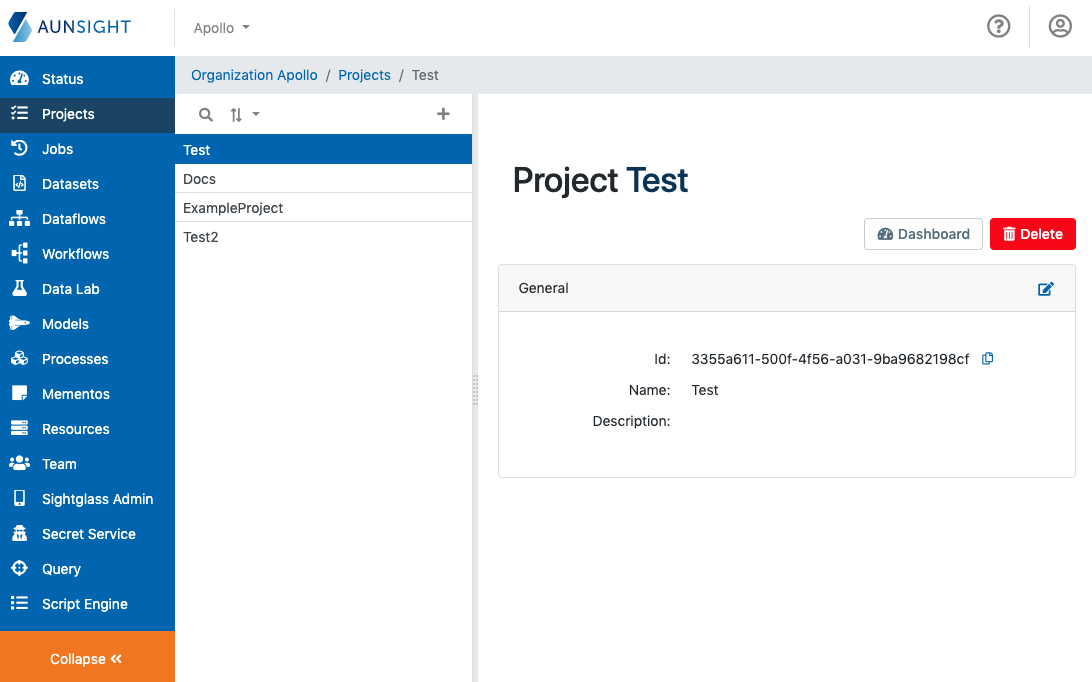
The web application interface displays general information about the project in a page section. To edit this information, click the edit icon (![]() ) in the upper right corner of this section.
) in the upper right corner of this section.
Two action buttons in the upper right of the project record can be used to manage the project as a whole:
-
Dashboard: Opens the project dashboard used to access the project by administrators who are not members of that project's team.
-
Delete: Deletes the project record.
Warning
Project deletion is irreversible.
Note
Deleting a project will not delete objects created within that context; however, they will only be accessible by users in the parent organization with permissions to view objects in any project. Care should be exercised before deleting projects with large numbers of objects to create orphaned objects. If objects have been orphaned, the Toolbelt can be used to transfer ownership to a new context: au2 <object type> context transfer --id <orphaned object> --project <new owning project ID>.
The Project Dashboard
Normally, projects are managed by members assigned the relevant roles and permissions within that project. However, as a bootstrapping and oversight mechanism, the project dashboard provides access to the Status, Jobs, and Teams workpaces to members of the parent organization with certain permissions over any project (e.g. AU-ORG:create-project-member-in-any-project and similar permissions for groups and roles).
- Status: The project status page which gives details about the context.
- Jobs: The jobs workspace for the present context.
- Team: The team workspace for the present context.
When creating a new project, one of the first tasks is to create a new team by adding members and assigning roles. Project creators will need to use the project dashboard to create a team leader role and add at least one new member to this role to allow team management within the project context. Once this has been done, users can enter the project context using context selector at the top of the web interface.