How to Add a Team Member
The core of all team management in Aunsight depends upon member accounts. Every member account represents a user profile and is used to track that user's active roles and project memberships. Roles and project memberships, in turn, determine what (if any) data they have access to. Moreover, because every user of the Sightglass app is included in Aunsight's data access and security model, member management is an important part of administering data solutions with Aunsight.
This tutorial will teach how to add members and check invitation status, and manage outstanding membership invitations. It is important to remember that administrators cannot immediately create an Aunsight account; they can only manage invitations. Aunsight users must confirm their member accounts with a valid email address, so accounts are not created until a user accepts the invitation in the email.
Note
Admins create invitations that allow users to finalize the creation of their member account.
The Team Management Component (Web Interface)
Adding members to an organization can be accomplished easily through team management in the web interface.
After logging in to the Web interface and selecting the relevant context you wish to work in, click the "Team" icon (![]() ) in the palette on the right.
) in the palette on the right.

Invite a Member
Team management enables members with the appropriate permissions to view members in the current organization, edit current members, and view and manage outstanding invitations.
To add a new member, click "Add Team Member." (on the right of the member table header)
This will start a dialog beginning with the "Add Team Member" screen.
Step 1: Enter email and project details
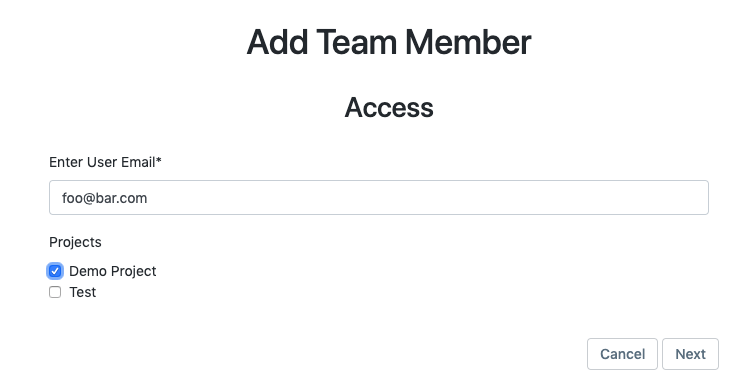
In the "Add Team Member" screen, enter the email address of the member you wish to add. This will serve as the member's login ID and is used to send certain notifications. The user will be asked to confirm this email address by clicking a link sent to that address.
It is also necessary to indicate the project(s), if any, to which the member should be added. Select any projects desired and click "Next" to proceed to the following step.
Tip
It is not necessary to add members to projects; however, if they do not have membership in a project they will not be able to be granted privileges within those groups, which effectively makes project resources off-limits to the member regardless of any privileges they may have in the parent organization.
Step 2: Add member roles
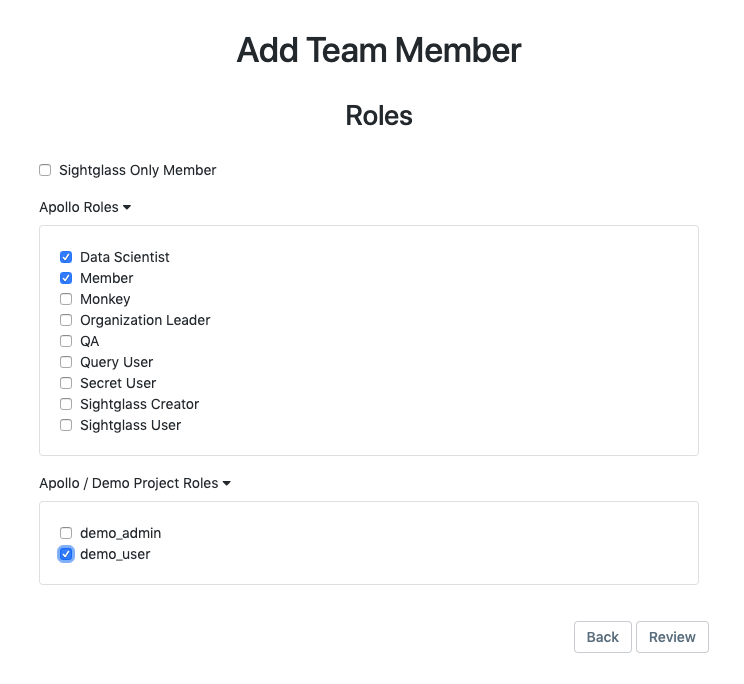
Once a user has been added to the parent organization and any projects within it, you must then specify roles you wish that user to perform in the parent organization and any projects they are a member of.
For members who only need access to Sightglass solutions via the mobile app, the easiest way to assign this role is by clicking "Sightglass Only Member" which grants access to the Sightglass solution delivery Cloud, but no roles in Aunsight directly.
For members who need more access, you must select roles for the organization and each project individually. Granting a user access to certain roles in the parent organization is not inherited by projects contained in the parent organization.
Note
You must individually select the roles for each project a user will have membership in. Each project defines separate roles and membership roles in the parent organization do not apply to projects created within that organization.
Once you have selected all the roles you wish to grant to a member for each organization, click "Review" to continue.
Step 3: Review and confirm
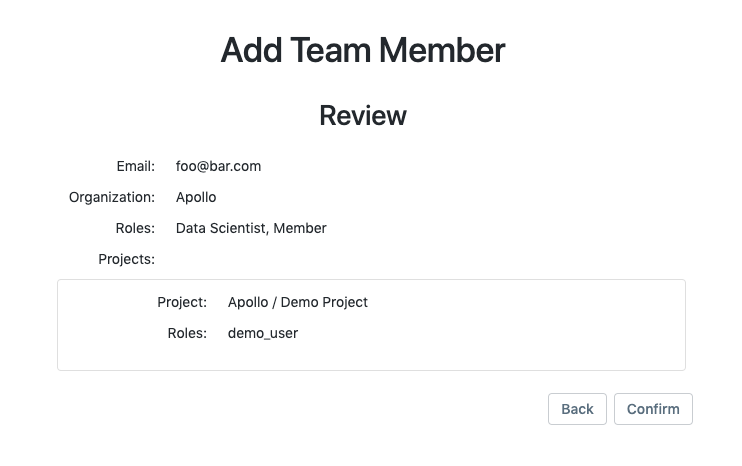
The final step in adding a new member is to confirm that everything has been entered correctly. If the member email and roles are correct, click "Confirm" to send an email invitation to the address provided or "Back" to return to the previous steps to make changes to the new member.
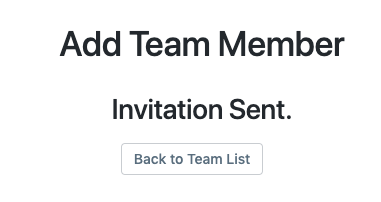
When you have clicked "Confirm" you will see a confirmation message. Click "Back to Team List" to return to team management.
Invitation Confirmation and Management
Before a member account is created, users must activate their membership by clicking the invitation link sent to the email address used to create that member.
Confirming Account Creation
Aunsight sends a message like the following to invite users to confirm their account creation:
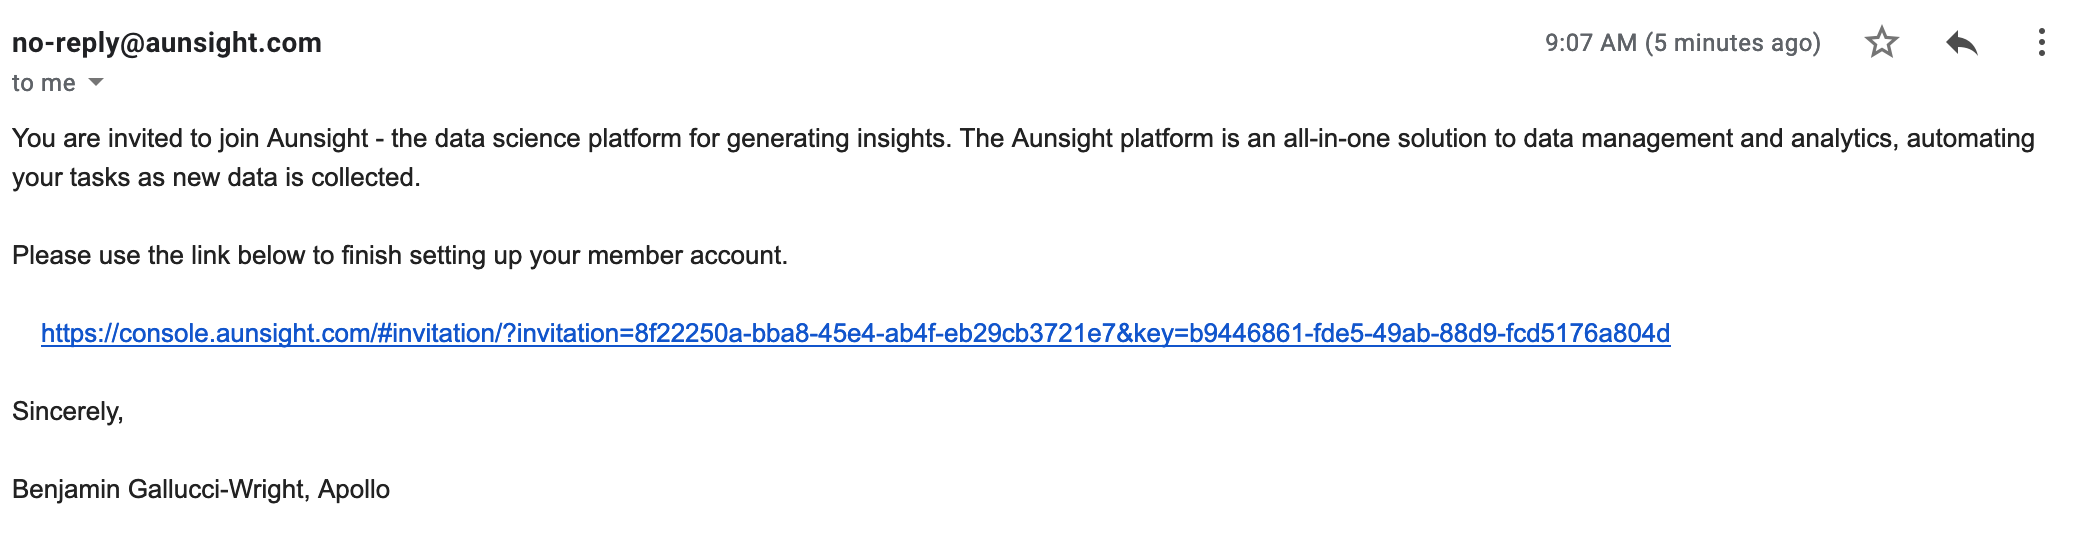
Aunsight administrators may wish to follow up with invited users to make sure they receive the email and click the activation link in a timely fashion. When an invited member clicks on the link, they are taken to the account setup page.
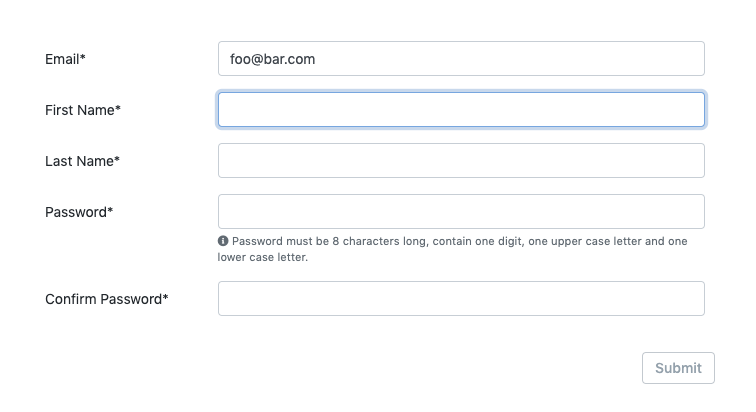
The invited member must enter their first and last name and create a password for the account.
Note
Because member accounts must be linked to a valid email address, users cannot change their membership email through the confirmation form.
Once the user has confirmed their member account, they can now access Aunsight using the memberships and roles that they have been granted at account creation in the previous step. Administrators may also make changes to existing accounts.
Managing Unconfirmed Account Invitations
Because users must confirm their account creation by email, administrators may sometimes wish to delete an invitation before a member has confirmed their account. To manage outstanding invitations, click the "Invitations" tab in team management to see a list of unconfirmed invitations.

The "Invitations" tab displays a table showing outstanding invitations so that administrators can check the status of and revoke unneeded invitations by clicking "Revoke" on the far right. Clicking "Revoke" will require the administrator to confirm that they wish to remove the account.
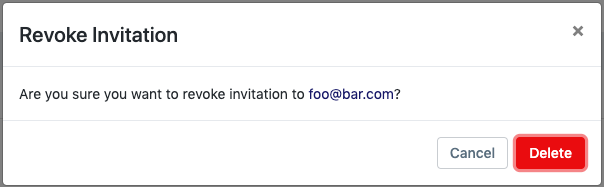
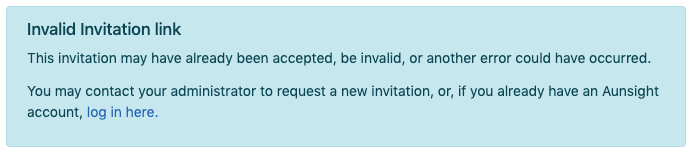
Revoking an invitation will disable the account activation link sent to that email address. A copy of that link will still exist in the user's email since it has already been sent to the mail server, but the link will no longer allow them to create an account. Instead, the link will inform the user that their invitation is no longer valid.
Warning
Revoked invitations cannot be restored; make sure you have a record of user information in case an invitation must be reinstated.