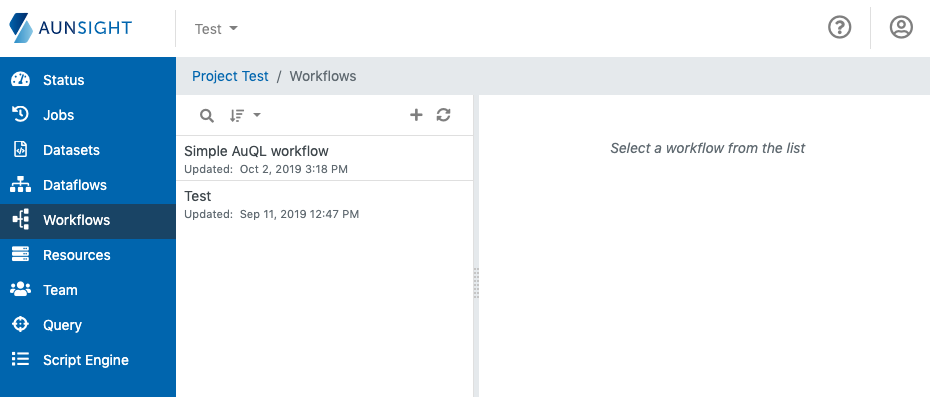
The Ten Minute Workflow
Building workflows is best learned by practice, so the following article presents a simple workflow that can be built in around ten minutes by following the step-by-step instructions in this article.
This workflow will allow users to specify parameters (arguments) for a workflow, parse the complex parameter object into three simple strings, and connect those strings as input for an email message. Workflows can do so much more than this simple example demonstrates, but the basic mechanics of the workflow builder interface apply to all kinds of workflows.
Step One: Create A Workflow
The first step is to create a new workflow. Log in to the Web interface and select a context to work in through the context selector. From that context's dashboard, click the "Workflows" icon (![]() ) in the palette on the right.
) in the palette on the right.
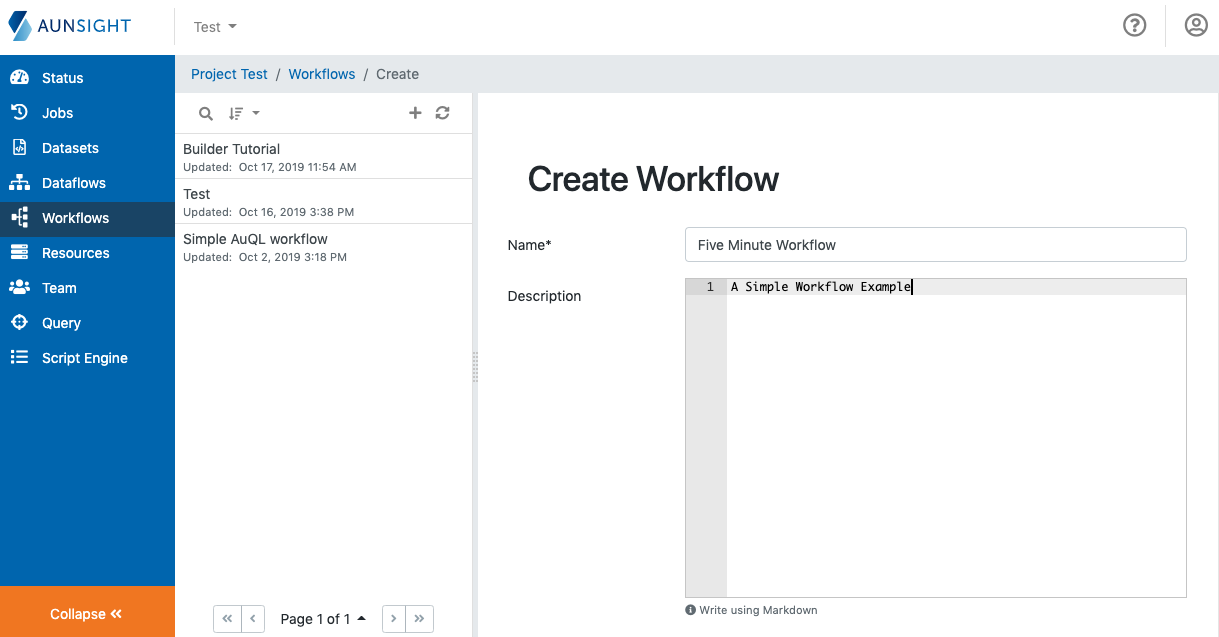
In the workflows workspace, click the plus icon (![]() ) to open a new workspace dialog. Enter a name for the workflow ("Five Minute Workflow", for example) and scroll to the bottom and click the "Create" button (
) to open a new workspace dialog. Enter a name for the workflow ("Five Minute Workflow", for example) and scroll to the bottom and click the "Create" button (![]() ).
).
After creating this workflow, select its record and open it in the Builder Interface by clicking the "Modify" button ( )
)
Step Two: Modify the parameters component
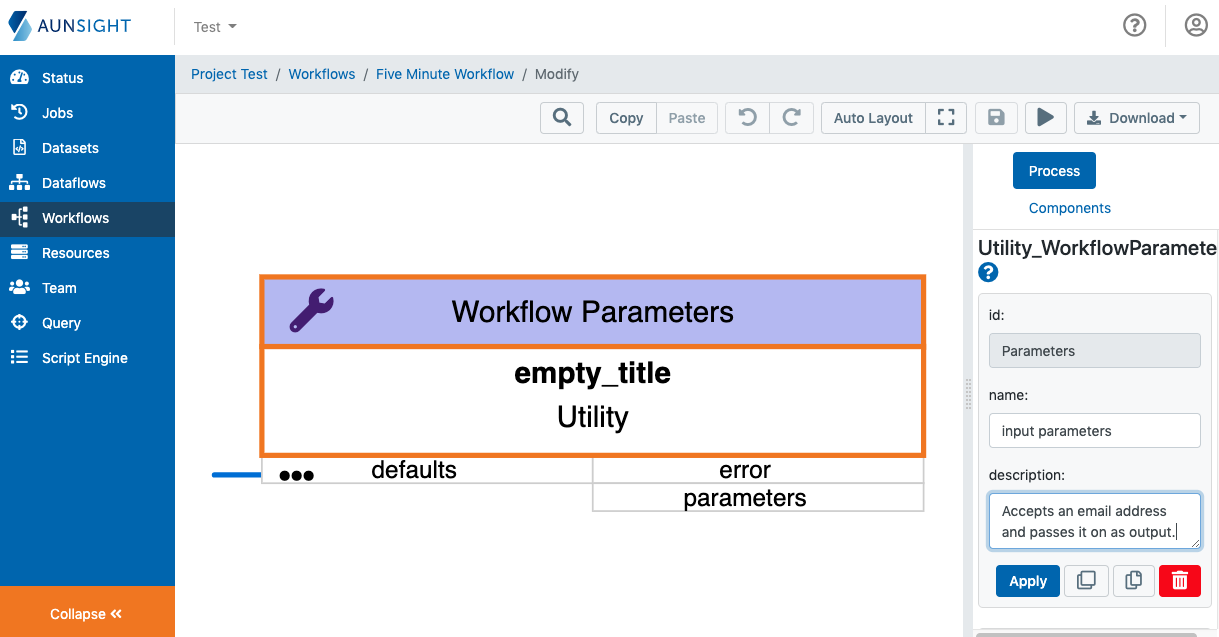
Newly created workflows contain one component by default: Workflow Parameters. The Workflow parameters component is a representation of the parameters object Aunsight passes to workflows when they are started. Not every workflow needs to define parameters so many workflows may remove remove this component from their graph, but in this tutorial, we will configure this component to accept three key/value pairs needed for sending an email message: text, html, and subject.
Click on the "Workflow Parameters" component in the canvas to edit it in the detail panel to the right of the canvas. To begin with, enter a name and description for this component as a way to document and organize your workflow. When done editing these fields, click "Apply" ( ) to apply these changes.
Tip
Naming and describing workflow components is a good practice to follow so that workflows are understandable to others. The "description" field can be thought of much like a docstring in traditional programming languages.
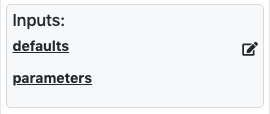
To configure the parameter data itself, scroll down in the detail panel to the "Inputs" section and click the "Defaults" field.
For this exercise, we need the user to supply three values needed to send an email:
- A plain-text message (
text) - An HTML-formatted version of the message (
html) - A plain-text subject (
subject)
To add these as key/value parameters, click the "edit" icon (![]() ) to bring up an editor window. Add the first key called
) to bring up an editor window. Add the first key called text and enter a default value (e.g. "Hello world!"). After entering the first parameter key/value pair, click the "plus" icon (![]() ) to add another until all three key/values parameters are entered.
) to add another until all three key/values parameters are entered.
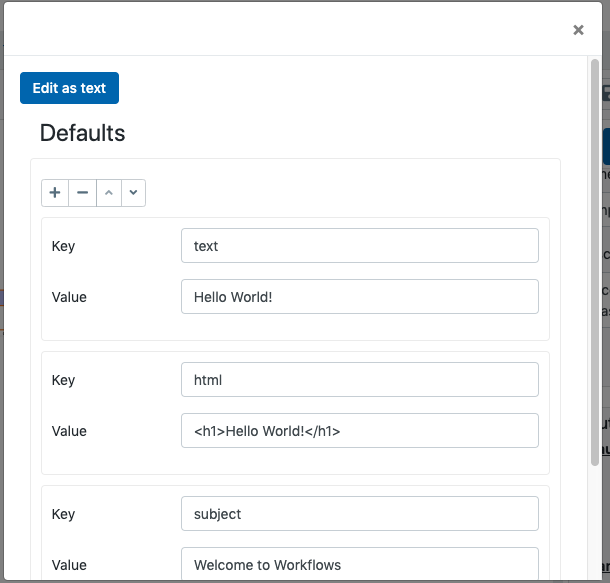
Scroll down and click "Submit" to accept these changes and return to the workflow canvas.
You will now see three key/value parameters and their defaults. When run, users will have the option of specifying different values for these three parameters, or use the defaults.
Step Two: Create an Email Component
Since the aim of this workflow is to send an email, we need to add an email component to our workflow. Click the "Components" tab from the details panel and scroll down to the "Notification" section. Select "Send Mail to Member" to add a component for sending email to a member.
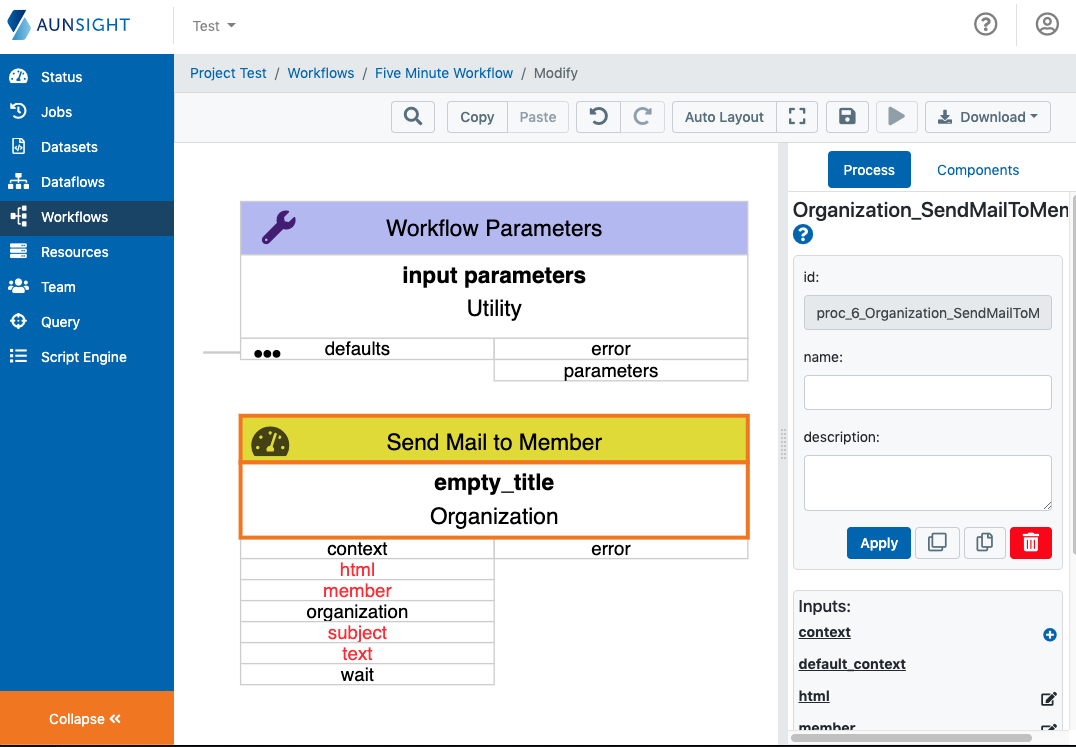
The canvas will now display two components. On the "Send Mail to Member" component, you will notice that four of this component's inputs are displayed in red, meaning that these are required inputs:
html: An HTML version of the message body (the default message).member: An Aunsight Member IDsubject: The email subject line (plain-text)text: Alternate plain-text version of the message body.
Because we have prepared the Workflow Parameters object to provide three of these values, we only need to specify one manually: member. Scroll down to the "Inputs" section of the workflow details and click the "edit" icon (![]() . This will bring up a member selection dialog. Select your own name so you can receive the test message that will be sent by the workflow. When complete, the inputs section should display your member ID with the remaining three required fields empty (
. This will bring up a member selection dialog. Select your own name so you can receive the test message that will be sent by the workflow. When complete, the inputs section should display your member ID with the remaining three required fields empty (html, subject, and text).
Step Three: Create Parameter Connection Components
Now that we have an email component, we need to connect the workflow parameters for html, text, and subject to the input parameters of our email component. Because the Workflow Parameters component actually passes a parameters object rather than individual key/value pairs, we need to select each value and pass it the respective input for the email component. Aunsight Workflows have a "Get Object Path" component that can select the value of a key/value pair by name.
To add this component, click "Components" on the details panel and scroll down to the "Object" section. Click "Get Object Path".
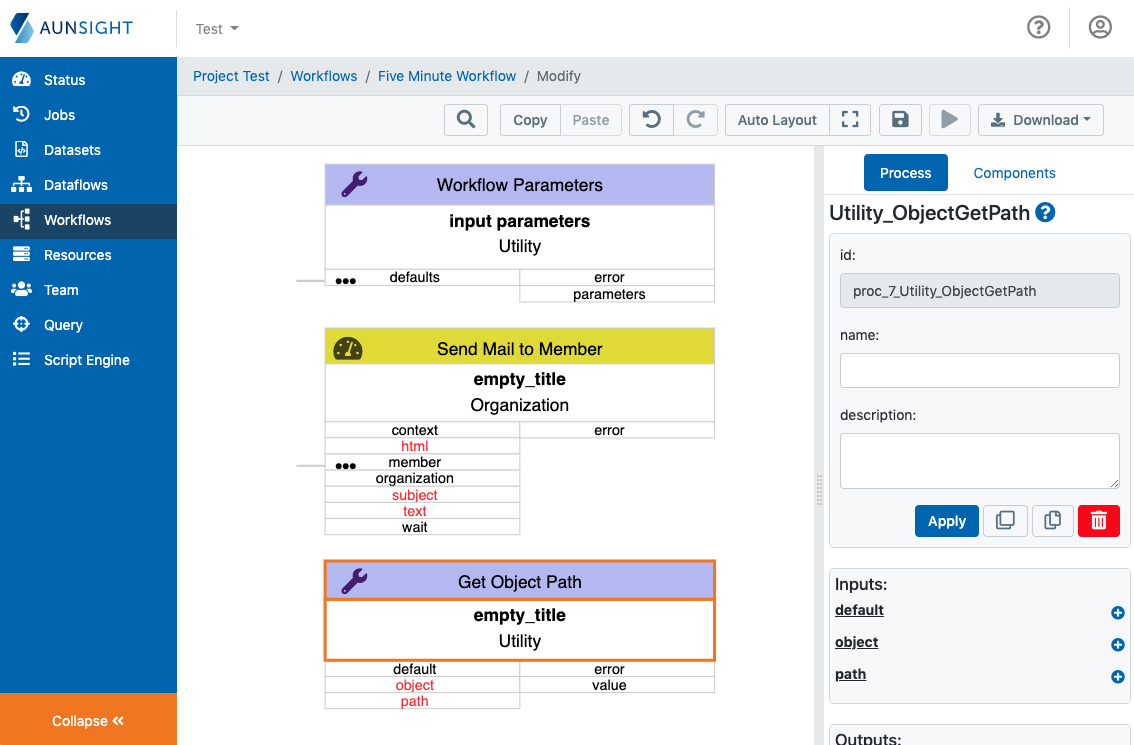
Since there need to be three "Get Object Path" components either create two more by repeating the above step, or duplicate the component two times by clicking the "Duplicate" button ( ) on that object's metadata section of the details panel.
With five components in our workflow the scheme becomes somewhat messy. Re-arrange the components so it is easier to see the connections between components we are about to make.
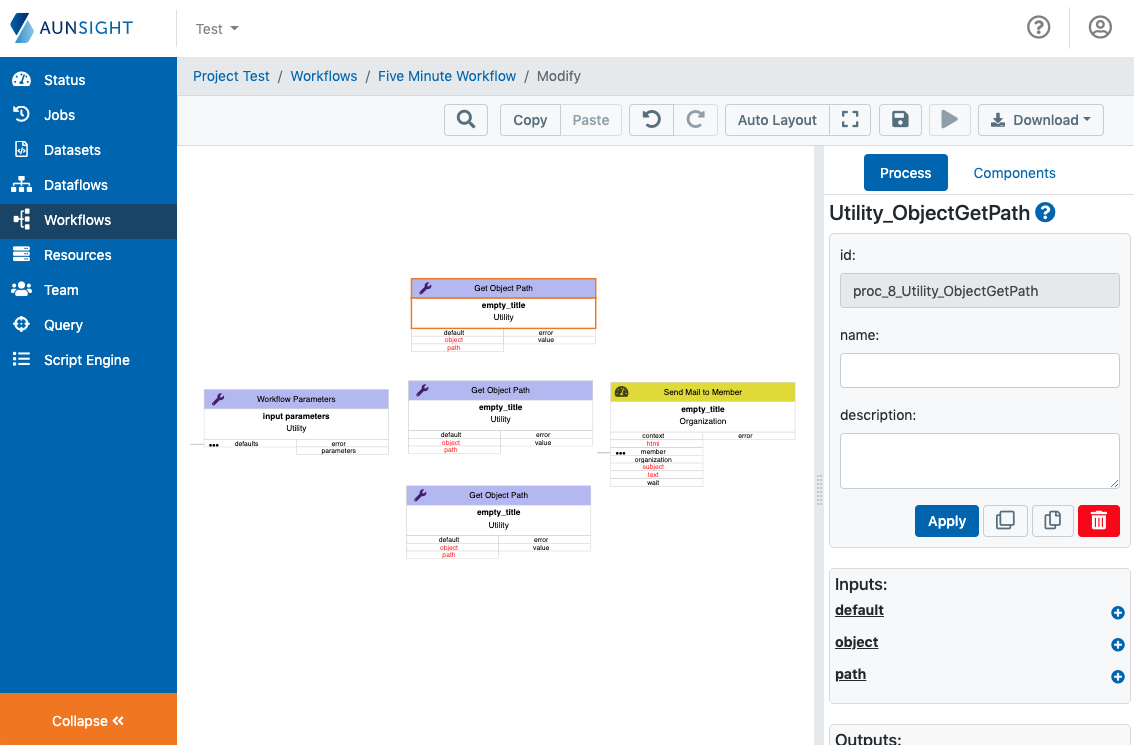
Once all the components are arranged, click and drag the parameters output of the Workflow Parameters component to the object input of each of the "Get Object Path" components to the parameters object, click and drag the parameters output of the Workflow Parameters component onto the object input of each Get Object Path component. The graph should now be connected like this:
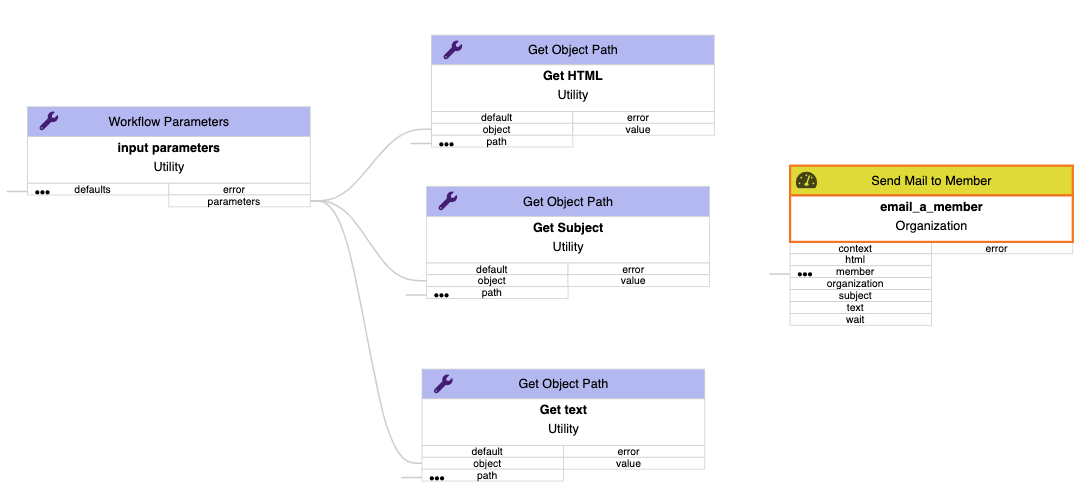
Next, we need to specify a "path" input for each object. Click the first "Get Object Path" component and enter the name as "Get HTML" and in the "path" input parameter, enter "html." This will specify that the "Get Object Path" should select the value of html which we have specified as a key for our workflow parameters. Repeat this same step with the other two "Get Object Path" components, specifying the path for each as "subject" and "text" respectively.
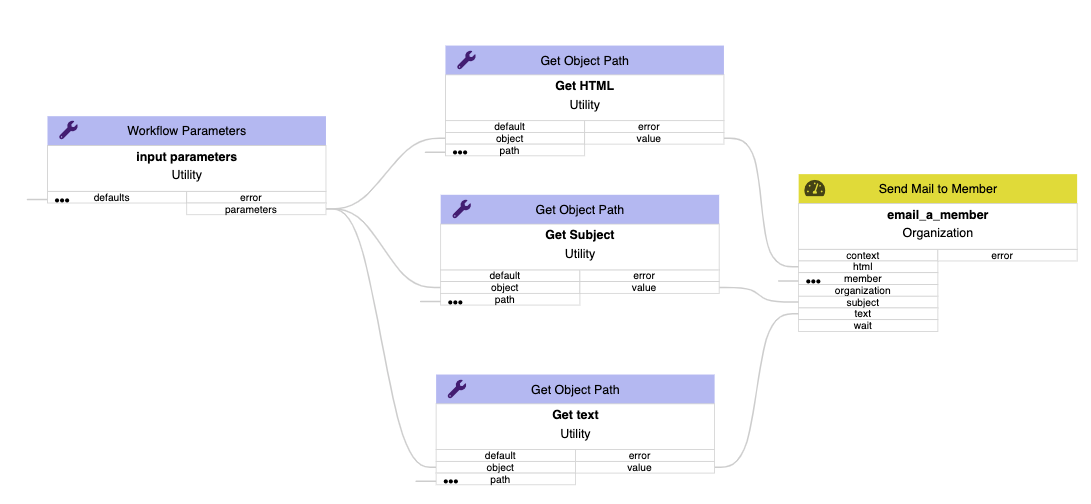
To complete the workflow, click and drag the "value" output of each "Get Object Path" component to its respectively named input. All the components should now be connected like this:
Step Four: Save and Run the Workflow
With all the components created and connected, our workflow is now complete. Save the workflow by clicking the "Save" icon ( ).
).
To run your workflow, click the "run" icon ( ). This will bring up a dialog where you can specify the runtime parameters to be passed to your workflow.
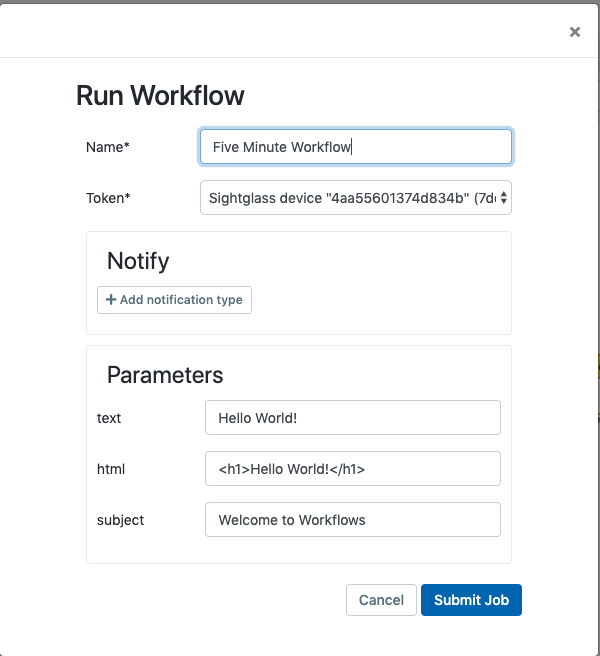
From this dialog you can enter the job name, token, and specify any notifications you would like for the job as you would when running any other workflow.
In this instance, you also see the three parameters we defined in step two of this tutorial: text, html, and subject.
Enter anything you would like in these fields, and click "Submit Job" button ( )
)
When run, Aunsight will submit a job and generate an email with the contents you pass as your parameters.
This workflows tutorial has only touched the beginning of what can be done, but the basic principles of using the workflow builder learned in this article will guide you through creating more complex workflows.