Create or Edit a Role
Roles allow administrators to define a model for data permissions once and then apply that model to multiple users in a team. This approach streamlines user management and helps to keep each team member's permissions appropriate to the roles that they fill on a data science team.
This tutorial will teach how to view the roles existing in a context, create a new role, and edit roles, in particular, by assigning permissions and policies.
Viewing Existing roles
To view existing roles, select a context you wish to work on using the context selector. Once inside that context (organization or project), click the "Team" icon (![]() ) on the palette on the left. This will open team management where you will see several tabs. Click the "Roles" tab to view a table of existing roles in the present context.
) on the palette on the left. This will open team management where you will see several tabs. Click the "Roles" tab to view a table of existing roles in the present context.
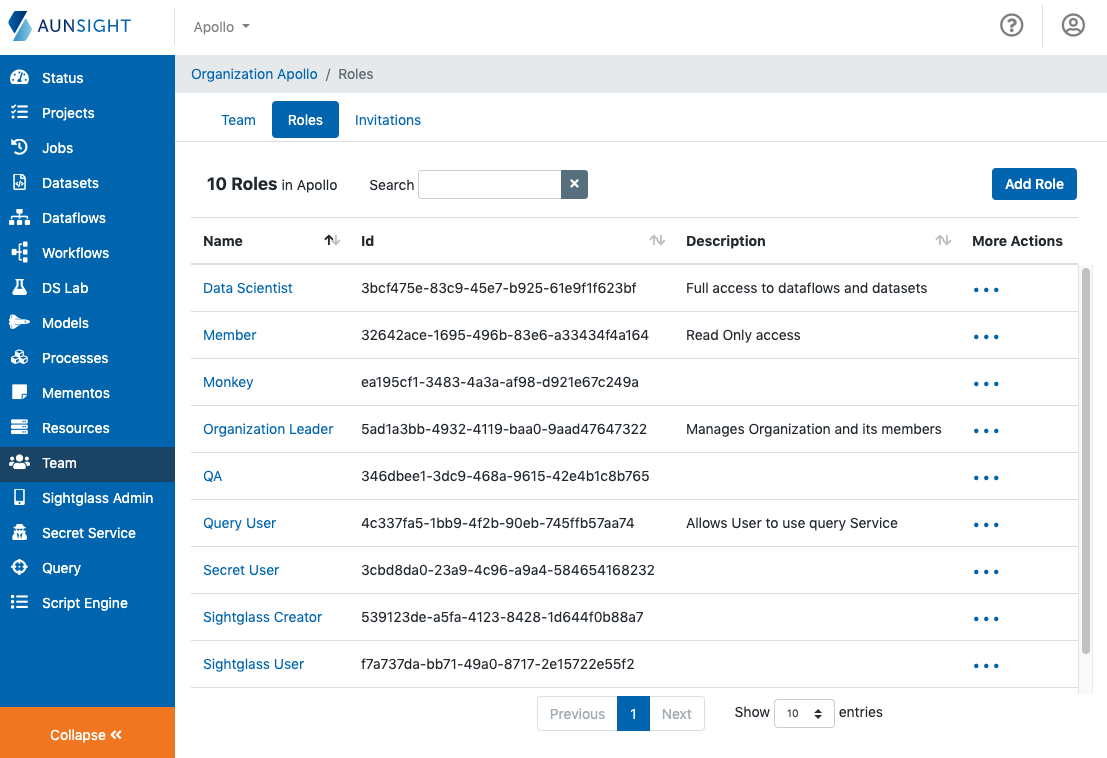
This table will display each role's name, resource ID (32-character hexadecimal string), and description.

View Details About a Role
To view more detailed information about a role, click the role's name in the first column of the roles table. This will bring up details about that role.
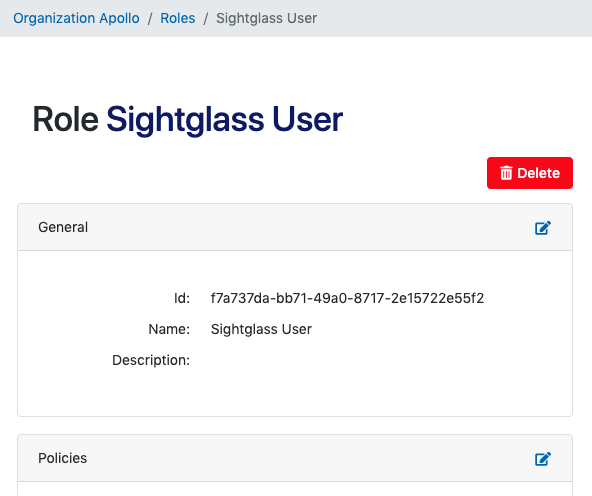
Under the details are three information sections that display information about this role:
- General
- Displays Role ID, Name, and Description.
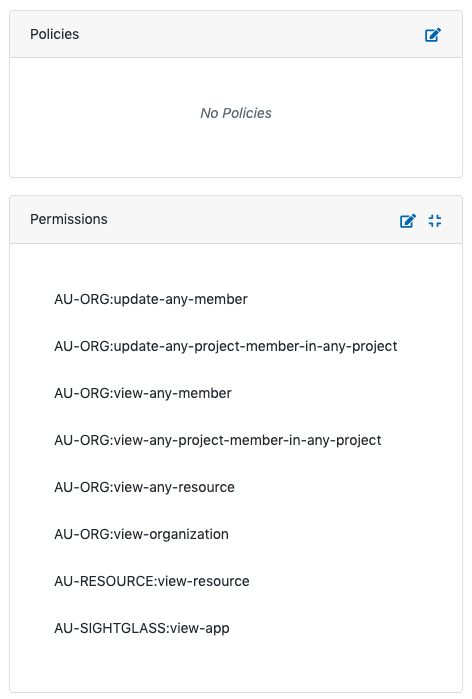
- Policies
- Lists policies granted to the role.
- Permissions
- Lists permissions granted to the role.
Scrolling down through an example role, we can see what permissions and policies have been granted to this role.
Edit a Role
In role details you can also edit any of the three sections by clicking the "edit" button in the upper right corner of the policies section. ![]() This will display a list of all available policies. Check or uncheck any policies you wish to change and click "Submit" at the bottom of the section to assign these policies to the role.
This will display a list of all available policies. Check or uncheck any policies you wish to change and click "Submit" at the bottom of the section to assign these policies to the role.
Add or Remove Policies from a Role
Policies provide a convenient handle for grouping individual permissions that need to be in place to perform a certain kind of work.
Policies are explained elsewhere at greater length, but in general, they are specific to a kind of Aunsight resource, and generally provide four levels of access:
- View
- Provides read-only access
- Run (Dataflows, Workflows, and Processes only)
- The same permissions as view, plus the ability to run tasks against compute resources.
- Edit
- The same permissions as run, plus the ability to update and edit.
- Manage
- The same permissions as edit, plus the ability to delete.
To add a policy or policies to a role, enter the "Roles" tab in team management and click the role's name in the first column of the roles table. This will bring up details about that role.
Scroll down to the "Policies" section. By default, this will display the policies granted by this role, if any. To make changes, click the "edit" button in the upper right corner of the policies section. ![]() This will display a list of all available policies. Check or uncheck any policies you wish to change and click "Submit" at the bottom of the section to assign these policies to the role.
This will display a list of all available policies. Check or uncheck any policies you wish to change and click "Submit" at the bottom of the section to assign these policies to the role.
Add or Remove Permissions from a Role
Although it is possible to construct a role by granting specific permissions one by one, in many cases a number of permissions may be required to perform a single task. For example, in order for a role to allow a member to run a workflow, that role needs to have two different permissions: AU-WORKFLOW:view-workflow and AU-WORKFLOW:submit-workflow. For some use cases, it may be necessary to have many different permissions to work with just one resource: a data engineer, for example, needs eight different permissions to create, read, update, and delete (CRUD) datasets. For some use cases, editing permissions by hand is the only way to design an access model appropriate for a particular context and role.
To add permissions to a role, scroll down to the "Permissions" section. By default, this will display the permissions granted by this role, if any. To make changes, click the "edit" button in the upper right corner of the permissions section. ![]() This will display a list of around a hundred and fifty permissions. Check or uncheck any permissions you wish to change and click "Submit" at the bottom of the section to assign these permissions to the role.
This will display a list of around a hundred and fifty permissions. Check or uncheck any permissions you wish to change and click "Submit" at the bottom of the section to assign these permissions to the role.
Note
Any modifications you make to the permissions granted to a role will apply to any existing users who are already assigned that role.
Create a New Role
Because members can carry more than one role in any single context, and because member permissions are the superset of the permissions granted by any and every role they have in a given context, many organizations may find that they can create a robust data access model with only a handful of different roles assigned. Individual members can have these roles added or removed as necessary to fine-tune the level of privileges they have at any given moment.
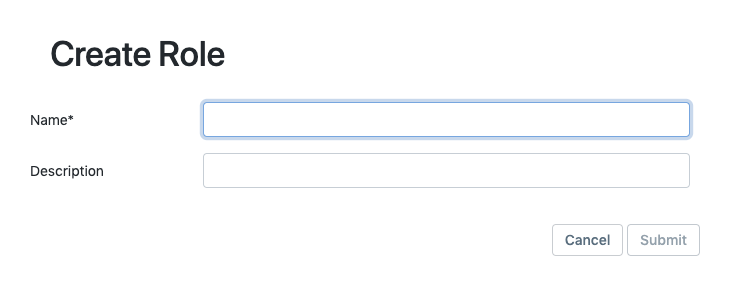
Occasionally, it may be necessary to create a new role to address a new kind of team member. To create a new role, enter the "Roles" tab in Team Management and click the "Add Role" button.
This will prompt the user to enter a name and description for the role. Enter the desired name and description and click submit to create the role.
Once a role has been created, Aunsight will display its details using the same interface seen above. By default, new roles have no policies or permissions assigned to them, so you will likely want to edit those roles at this point as you would if you were making changes to an existing role as described above.
Understanding Policies, Permissions, and Context
As you create new roles for your organization or project, it is important to understand how permissions and policies work together to create a data access model. In designing a model from scratch, it may be helpful to learn more by reading about policies and permissions and how project context effects what data a member can see from their dashboard.