Add a Member to a Sightglass Solution
Users of Sightglass, Aunsight's data solutions delivery application for iOS, Android, and the Web are members of an Aunsight organization with permission to access designated Sightglass solutions and data pushed to the Cloud. The first step in connecting a user to Sightglass is to add them as a member of the organization or project which owns the solution. Once you have a member account in that context, you can add members to a solution one of two different ways.
Note
In order to administer Sightglass solution membership, users must have all of the following permissions granted through a role or group:
AU-SIGHTGLASS:view-app- To use the Sightglass Admin dashboard and browse available solutionsAU-SIGHTGLASS:update-app- To make changes to an app (including app membership)AU-SIGHTGLASS:view-app-membership- To see membership for an appAU-SIGHTGLASS:update-app-membership- To change membership of an appAU-SIGHTGLASS:publish-app- To publish changes to an app, including changes to membership, into the Cloud
Method 1: Member Details Page
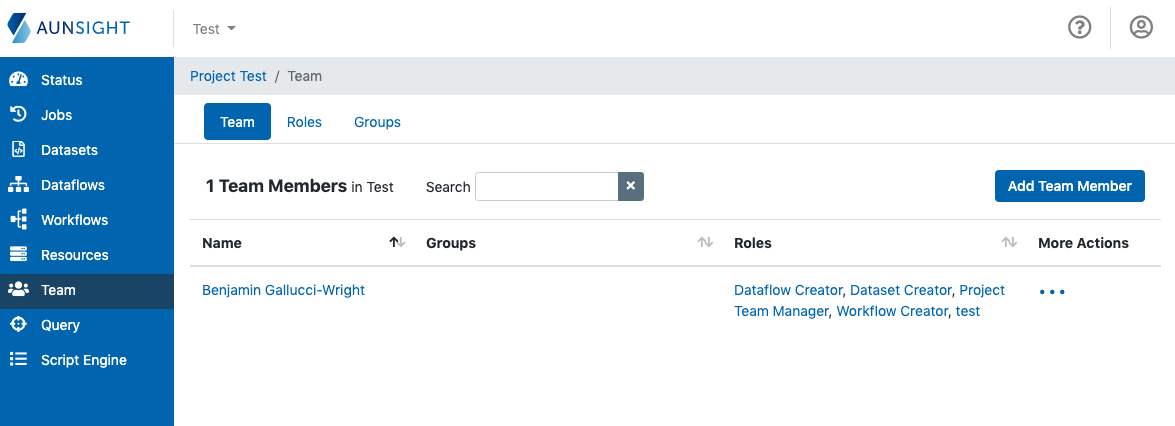
Click the "Team" icon (![]() ) on the palette on the left. This will default to the team members table.
) on the palette on the left. This will default to the team members table.
Click on the name of a member to bring up the details page, then click the "Sightglass Memberships" tab.
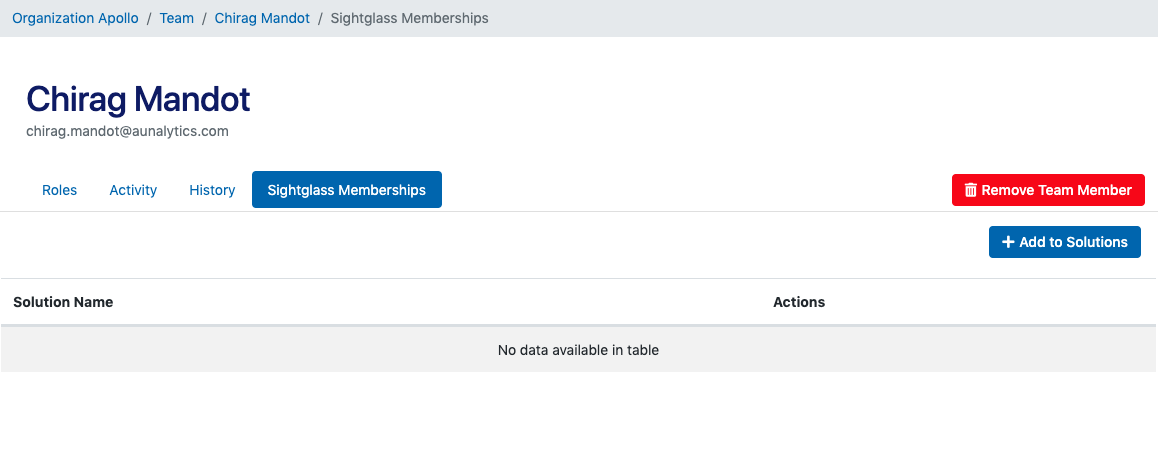
This will display a list of all Sightglass solutions to which a member has access. To add this member to a solution, click "Add to Solutions" to bring up a selection dialog:
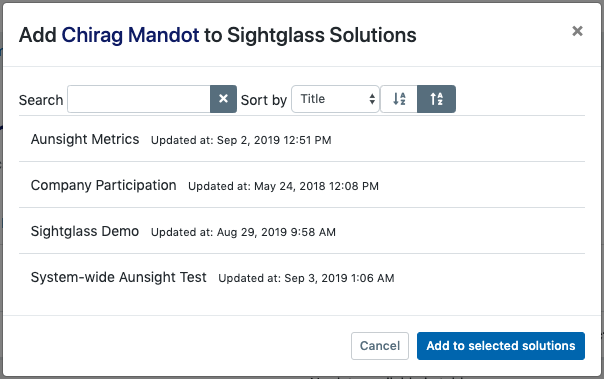
Search or sort the list, and then simply click the name of any solution(s) you want to add, and then confirm by clicking "Add to selected solutions." Aunsight will then return to the "Aunsight Solutions" tab of the member details page. You will then see the solution(s) you selected in the previous step displayed in the table.

The table will list the name of the solution(s) to which the current member belongs, as well as several action buttons:
- "Remove" will remove this member from the solution.
- "Edit filters" allows you to view or edit user filters in use for this member.
- "Publish" (may not be present for all solutions) allows you to publish a new version of a solution if it is out of date.
- The "Go to solution users" icon (
 ) will take the user to the solution users tab of that Sightglass solution.
The last action button in the previous list will take the user to the solution users tool, which is the other method for adding, removing, or editing users from a Sightglass solution.
Once you have added a member to a solution, they will not be able to access that solution until the new membership information is published to the cloud. Click "Publish" to immediately publish the membership information to the cloud.
Note
Membership information is published every time a new dataset is published to the solution. However, for some solutions, this occurs infrequently so users should publish the app every time they add a new user.
Method 2: Sightglass Admin
Click the "Sightglass Admin" icon (![]() ) on the palette on the left. This will display a list of Sightglass solutions available in the current context.
) on the palette on the left. This will display a list of Sightglass solutions available in the current context.
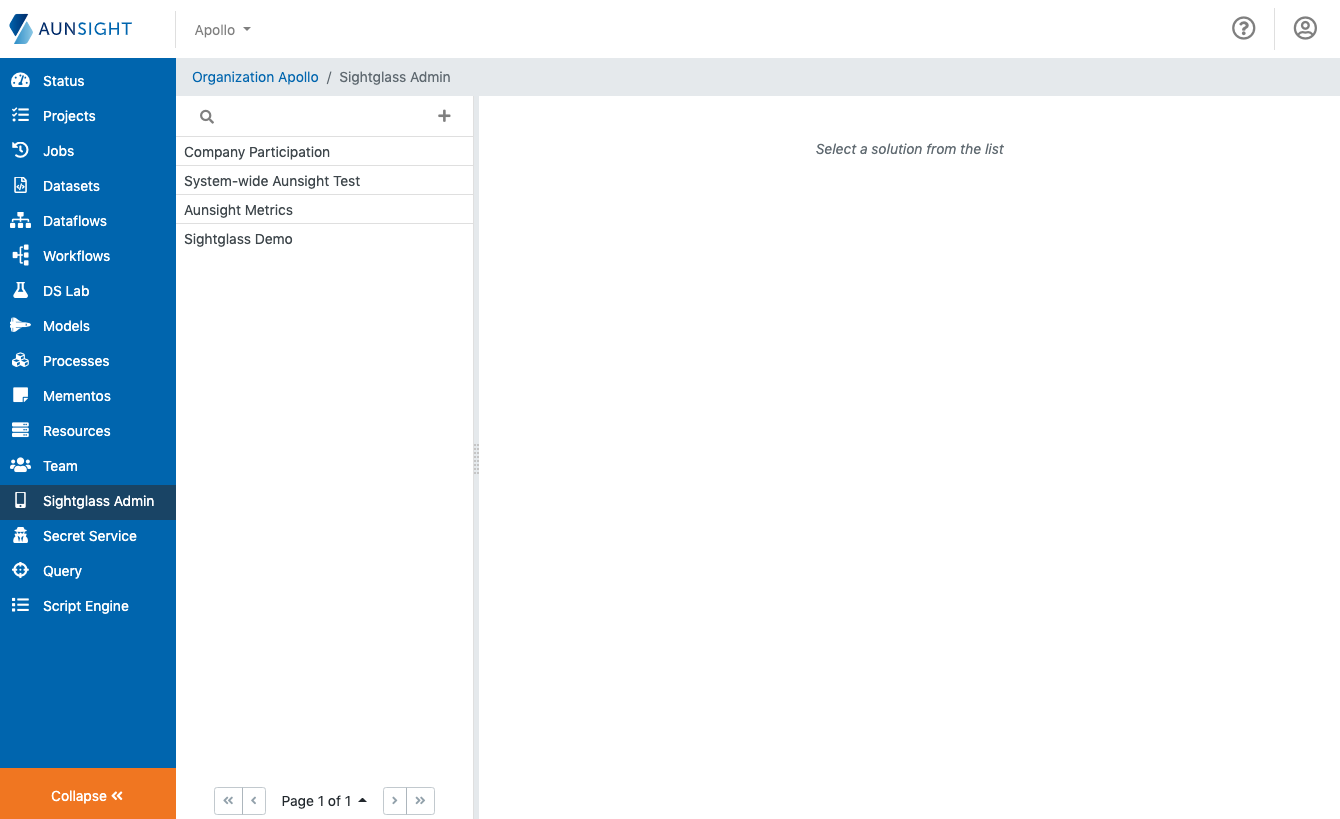
Search the list to find the desired solution and click its name to display its details. Sightglass admin will display various tabs; click "Solutions users" to display a list of members for that solution.
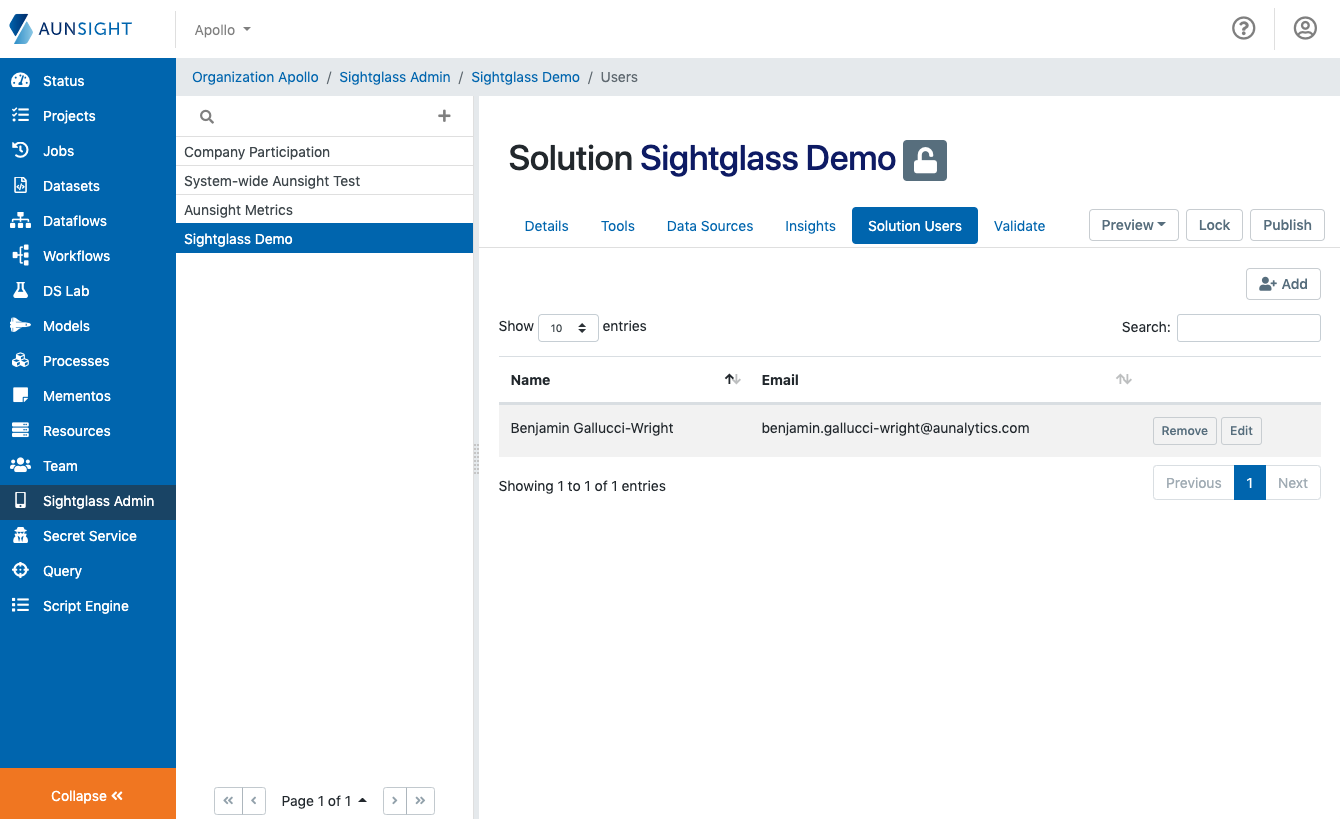
To add a member to the solution, click the "Add" icon ( ) in the upper right corner of the members table. This will open a dialog where you can search and select a member to add to the solution.
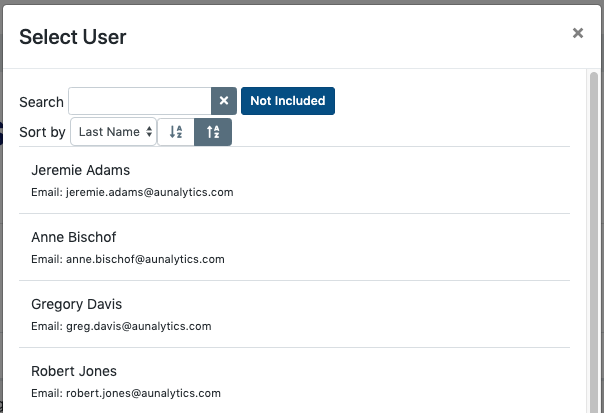
When you have found the desired member, simply click on the name to add that member to the solution.

Removing members can be done by clicking the "Remove" action button on the far right of that member's row in the table. You will be asked to confirm deletion of the member account.
You can also view or edit Sightglass filters in use for this member by clicking the "Edit" button.
Note
Changes to a solution's membership need to be published to the Cloud before users of the mobile app will see those changes. To do this, click the "Publish Users" button in the upper right corner of the Solution Users tab.
![]()
Configure your Sightglass Solution for Members
Depending upon the nature of the Sightglass solution you wish to assign to a member, it may be helpful or even necessary to provide member filters to make sure dashboard tools and data displayed to the user are appropriate for that user. Learn more about Sightglass filters to customize the Sightglass experience for individual members.