Navigating Dataflows: The Mechanics
Objective:
To utilize the power of the Dataflows tool, you first need to know some of the basic mechanics. This tutorial is designed to help acquaint you with the functionality of the interface. Some of the fundamental skills you will learn in this tutorial include how to:
- Create a dataflow
- Import and Load a dataset
- Store a dataset
- Save a dataflow
- Open and modify an existing dataflow
Prerequisites:
Prior to beginning this tutorial, we have already logged in to the Aunsight platform and navigated to our organization. Since we will be importing, loading, and storing a dataset in this tutorial, we have already created a dataset. If you would like to review these steps, please visit the following tutorials.
How to Create a Dataflow
1. Select the Dataflows Tool
In the panel on the left, select Dataflows.
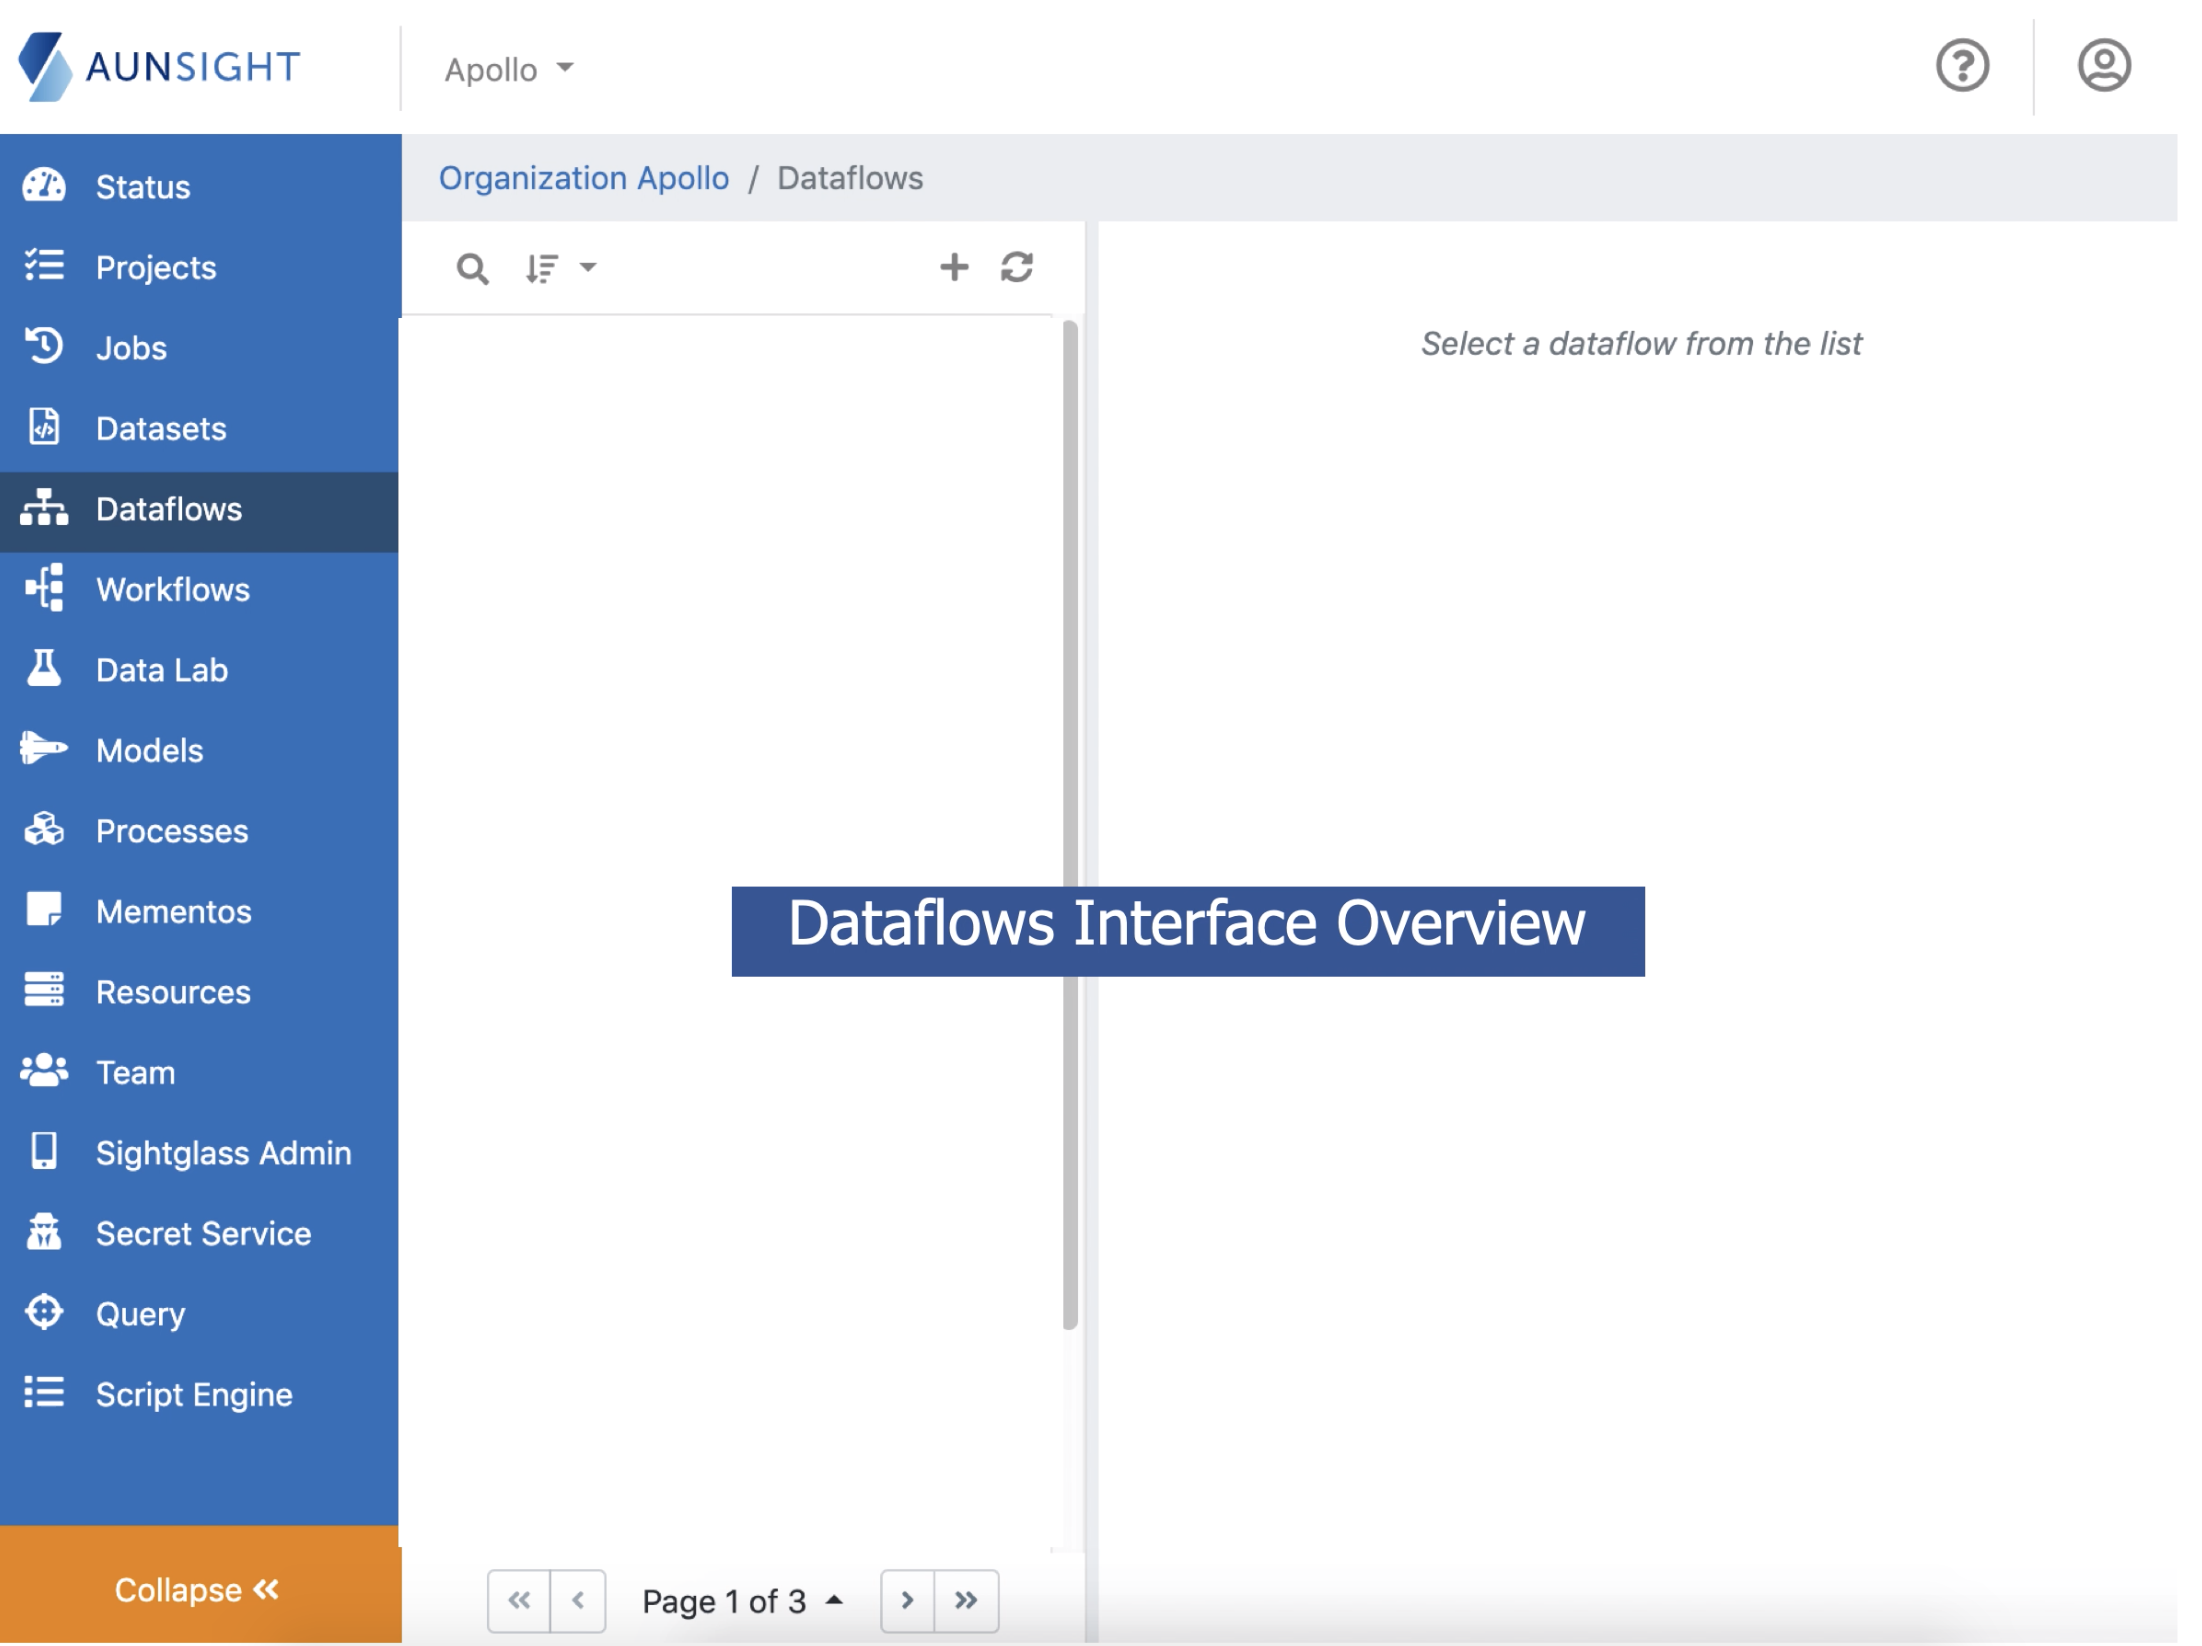
Get to Know the Dataflows Interface:
In the Dataflows interface, there is a panel that lists existing dataflows, if any, for the selected context. There are tools available for sorting and searching existing dataflows. Pagination tools are available at the bottom of the existing dataflow list to browse other pages. If an existing dataflow is selected, the details will appear in the main pane of the page.
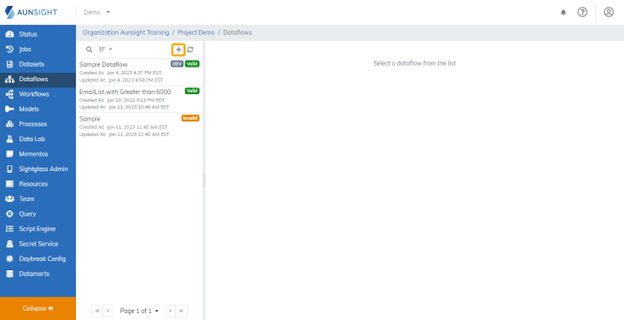
2. Add a New Dataflow
Select the + icon at the top of the list of existing dataflows.
The window will change to the Dataflow Editor.
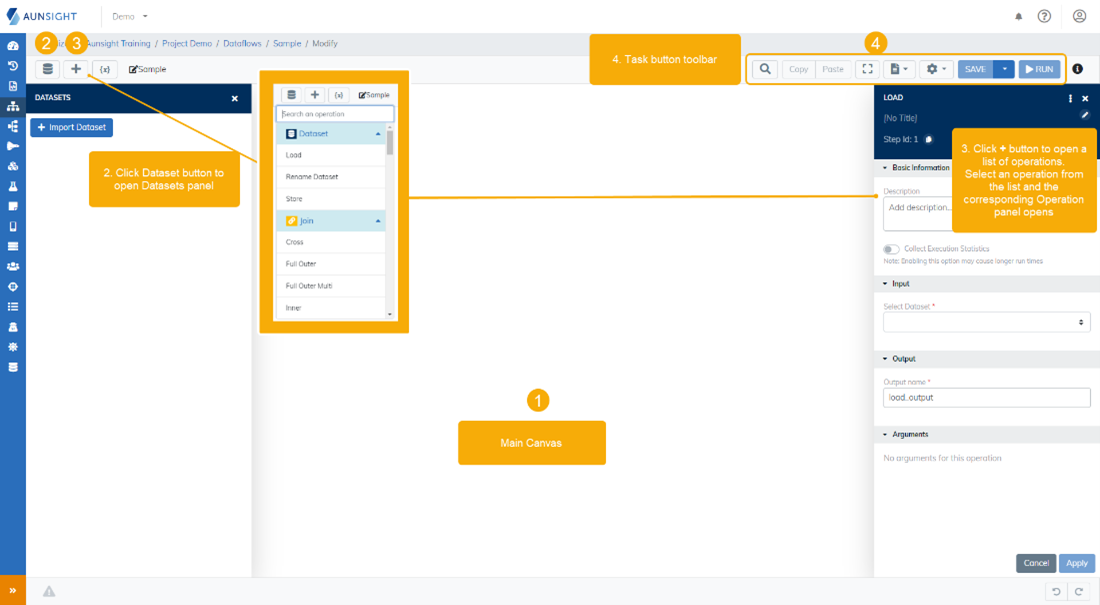
Get to Know the Dataflows Editor:
There are four primary components of the Dataflow Editor.
-
The main canvas displays the relationship between different operations in a graphical layout.
-
Clicking the database icon button opens the Insert Dataset panel on the left, allowing for dataset import.
-
Clicking the + button allows for operation selection and display of the Operation panel on the right.
-
Finally, the toolbar across the top provides quick access buttons for common tasks.
Click the X in the upper right corner of the Datasets or Operation panel to close it.
3. Import a Dataset
Click the Dataset icon ( ) to import an existing dataset.
In the Import Datasets dialog, click on the dataset to import from the Available datasets list. This moves it to the Selected dataset list. If needed, use the search to locate the dataset.
Before you can perform operations on your dataset, it will need to be loaded into the dataflow. The option to Create load operation(s) automatically is checked by default when importing datasets.
Click Import.
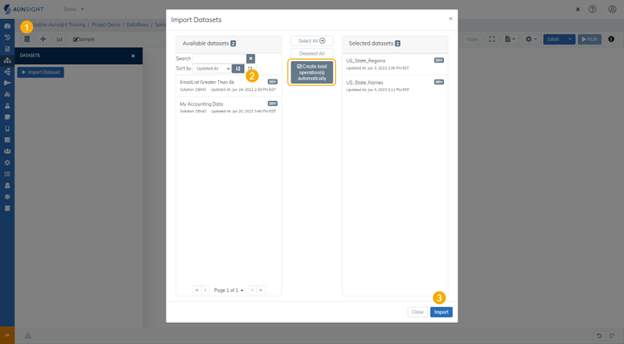
The imported dataset appears in the Datasets panel and as a tile on the canvas.
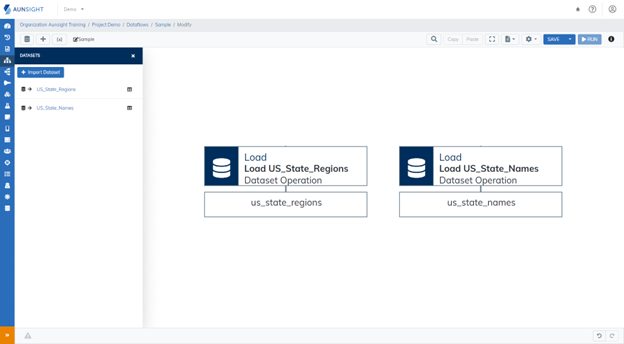
Get to Know the Interface: Dataset and Operation Details
The Datasets panel will display a list of imported datasets. Next to each dataset is a Table icon ( ). Click this icon to open a separate dialog to browse the dataset.
In the Canvas, selecting an Operation tile, brings that tile into primary focus on the canvas and opens its corresponding Operations panel on the right. In this case, clicking the Load operation opened the Load Operation panel.
). Click this icon to open a separate dialog to browse the dataset.
In the Canvas, selecting an Operation tile, brings that tile into primary focus on the canvas and opens its corresponding Operations panel on the right. In this case, clicking the Load operation opened the Load Operation panel.

4. Store a Dataset
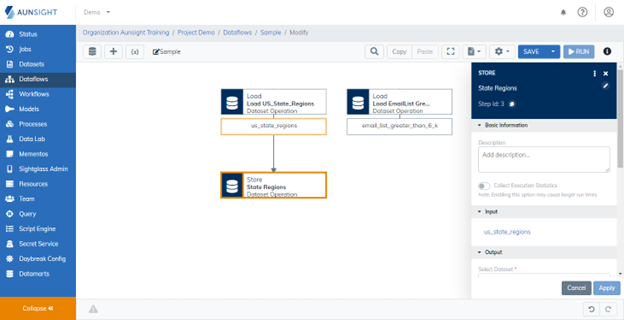
To store a dataset at the end of a series of operations, select the + icon to add a new operation. When the menu appears, select Store from the list. The Operation panel will automatically open on the right and display the details pertinent to the new store operation. Complete the details for the store operation:
-
Type a title and optional description.
-
Choose the appropriate input(s), if they have not been selected automatically, by clicking the Select input link and then the appropriate dataset name from the Canvas.
-
Choose the output dataset. The choices will include a new dataset or any datasets that have been imported but not loaded in the dataflow.
-
Click apply.
Note
Be mindful about overwriting existing datasets. To learn more about the process of using the store operation to overwrite existing datasets and the appropriate use case, visit the following tutorial. Overwriting Datasets
After applying the changes to the Store operation, the Canvas and Operation Panel will update to reflect the added operation.
How to Save a Dataflow
To save a dataflow, click the Save button on the right side of the toolbar. When the Save new Dataflow dialog opens, enter desired dataflow name and description (optional). If appropriate, choose the related tags. Submit the changes.
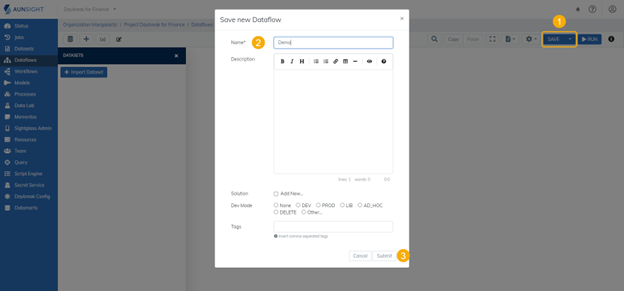
The breadcrumb path under the organization context will update to include the new name of the dataflow. This confirms that the save was successful.

How to Open and Modify an Existing Dataflow
1. Select the Existing Dataflow
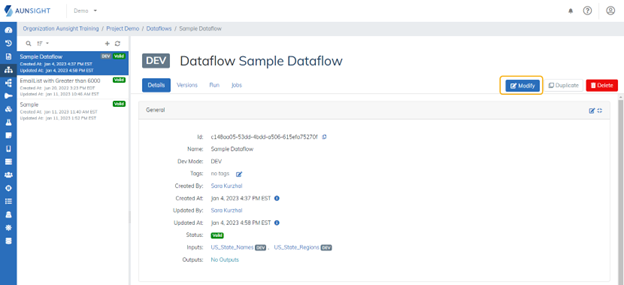
From the list of existing dataflows, select the name of dataflow you wish to edit. The main pane will update to display the details of that dataflow.
2. Select Modify
To open an existing dataflow in the Dataflow Editor, select Modify.
Warning
Don't forget to save your changes as you modify your dataflow.
Next Steps:
Now that you have created a new dataflow and saved it, you might want to take a look at how some common operations are implemented. To complete your first dataflow with a common sequence of operations, visit the following tutorial. Use Case 1